...

What We Think

Blog

Keep up with the latest in technological advancements and business strategies, with thought leadership articles contributed by our staff.
TECH

December 2, 2025

PostgreSQL Query Optimization: How to Make Your Queries Fast, Efficient, and Scalable

Query performance is the heartbeat of any high-traffic application. Even with a well-designed architecture, a single inefficient query can lock up resources, spike CPU usage, and degrade the user experience.

In this guide, we go beyond the basics to explore how PostgreSQL executes queries, why bottlenecks occur, and actionable techniques to ensure your database scales efficiently.

How PostgreSQL Executes a Query

Understanding the lifecycle of a query helps you "think" like the database.

  1. Parsing: PostgreSQL checks the SQL syntax.

  2. Rewriting: It applies rules (e.g., converting views into base tables).

  3. Planning / Optimization: The Planner evaluates multiple paths (Scan types, Join methods) and calculates a Cost for each. It selects the path with the lowest estimated cost.

  4. Execution: The Executor runs the plan and returns results.

Key Scan Types to Watch:

  • Seq Scan (Sequential Scan): Reads the entire table. Good for small tables, bad for large ones.

  • Index Scan: Looks up specific rows using an index.

  • Index Only Scan: Retrieves data directly from the index without visiting the heap (table storage). (Fastest)

  • Bitmap Heap Scan: A middle ground, combining index lookups with batch table reads.

Master EXPLAIN (ANALYZE, BUFFERS)

Don't just guess—measure. While EXPLAIN ANALYZE gives you time, adding BUFFERS reveals the true cost regarding memory and disk I/O.

Command:

SQL
EXPLAIN (ANALYZE, BUFFERS) 
SELECT * FROM orders WHERE customer_id = 123;

What to look for:

  • Execution Time: Actual time taken.

  • Buffers shared hit: How many data blocks were found in memory (RAM). High is good.

  • Buffers read: How many blocks had to be read from the disk (Slow).

  • Rows (Estimated vs. Actual): If these numbers differ significantly (e.g., est 1 row, actual 10,000), your table statistics are likely outdated.

Proper Indexing Strategy

Indexes are powerful, but they are not free—they consume disk space and slow down INSERT/UPDATE operations.

Choose the Right Index Type

  • B-Tree (Default): Best for =, <, >, BETWEEN, and sorting (ORDER BY).

  • GIN: Essential for JSONB and Full-Text Search.

  • GiST: Optimized for geospatial data (PostGIS) and complex geometric types.

  • BRIN: ideal for massive, time-series tables (e.g., billions of rows of logs) ordered physically by date.

Pro Tip: Use Covering Indexes (INCLUDE)

If you only need a few columns, you can include them in the index payload to achieve an Index Only Scan.

Scenario: You frequently query status by customer_id.

SQL
-- Standard Index
CREATE INDEX idx_orders_customer ON orders(customer_id);

-- Covering Index (Better)
CREATE INDEX idx_orders_customer_covering ON orders(customer_id) INCLUDE (status);

Now, SELECT status FROM orders WHERE customer_id = 123 never touches the main table table, reducing I/O drastically.

Optimizing JOIN Operations

Joins are expensive. Help the planner by keeping them simple.

  • Index Foreign Keys: Ensure columns used in ON clauses are indexed on both sides.

  • Avoid Casting:

    • JOIN ... ON o.order_code::text = p.product_code (Cannot use index)

    • ✅ Ensure data types match in the schema design.

  • Filter Before Joining: Reduce the dataset size before the join happens.

Example:

SQL
SELECT c.name, o.total 
FROM customers c
JOIN orders o ON c.id = o.customer_id
WHERE o.created_at > '2024-01-01';
-- Ensure an index exists on orders(created_at) so PG filters orders first!

Fetch Only What You Need

Transferring data over the network is often the unseen bottleneck.

Avoid SELECT *

Using SELECT * prevents "Index Only Scans" and adds network latency. Always list specific columns.

Use LIMIT and Paging

Never return thousands of rows to a frontend application.

SQL
SELECT id, status FROM logs ORDER BY created_at DESC LIMIT 50;

Materialized Views for Heavy Analytics

For complex aggregations (Sums, Averages) over large datasets that don't need real-time accuracy, use Materialized Views.

SQL
CREATE MATERIALIZED VIEW monthly_sales_report AS
SELECT 
    DATE_TRUNC('month', created_at) as month, 
    SUM(total_amount) as revenue
FROM orders
GROUP BY 1;

-- Create an index on the view for fast lookup
CREATE INDEX idx_monthly_sales ON monthly_sales_report(month);

To update data without locking the table (Crucial for production):

SQL
REFRESH MATERIALIZED VIEW CONCURRENTLY monthly_sales_report;

Partitioning for Scale

When a table exceeds ~50GB or 100 million rows, B-Tree indexes become deep and slow. Partitioning breaks the table into smaller, manageable chunks.

Example: Range Partitioning

SQL
-- 1. Create Parent Table
CREATE TABLE logs (
    id SERIAL, 
    created_at TIMESTAMP NOT NULL, 
    message TEXT
) PARTITION BY RANGE (created_at);

-- 2. Create Partitions (Child Tables)
CREATE TABLE logs_2024_01 PARTITION OF logs 
    FOR VALUES FROM ('2024-01-01') TO ('2024-02-01');

CREATE TABLE logs_2024_02 PARTITION OF logs 
    FOR VALUES FROM ('2024-02-01') TO ('2024-03-01');

Benefit: Queries with WHERE created_at = '2024-01-15' will only scan logs_2024_01 and ignore others (Partition Pruning).

Optimizing String Search

The standard LIKE '%term%' starts with a wildcard, rendering B-Tree indexes useless.

Solution: pg_trgm extension Trigram indexes break strings into 3-character chunks, allowing fast wildcard searches.

SQL
CREATE EXTENSION IF NOT EXISTS pg_trgm;

CREATE INDEX idx_users_email_trgm ON users USING GIN (email gin_trgm_ops);

-- Now this query is indexed:
SELECT * FROM users WHERE email LIKE '%gmail%';

Configuration Tuning

Don't run PostgreSQL with default settings (which are often tuned for compatibility, not performance). Key parameters in postgresql.conf:

  • shared_buffers: Set to ~25% of total RAM. Dedicated memory for caching data.

  • work_mem: Memory per operation (sorts/hash joins). Caution: This is per connection. Too high = Out of Memory. Start with 16MB-64MB.

  • random_page_cost: Default is 4.0 (for HDDs). If using SSDs, set to 1.1. This encourages the planner to use indexes more often.

  • effective_cache_size: Set to ~75% of total RAM. Helps the planner estimate OS caching capability.

Conclusion

Optimization is an iterative process. Start by identifying the bottleneck using EXPLAIN (ANALYZE, BUFFERS), apply the appropriate index or schema change, and measure again.

Quick Checklist:

  1. Did you avoid SELECT *?

  2. Are your Foreign Keys indexed?

  3. Are you using the correct Index type (B-Tree vs GIN)?

  4. Did you run VACUUM ANALYZE recently to update statistics?

  5. Is your random_page_cost configured for SSDs?


Reference Links


Ready to get started?

Contact IVC for a free consultation and discover how we can help your business grow online.

Contact IVC for a Free Consultation
View More
TECH

December 2, 2025

Qt Quick 3D in a Nutshell

Qt Quick 3D in a Nutshell

Qt Quick 3D is Qt’s high-level 3D API that extends the familiar Qt Quick world into three dimensions. Instead of bolting on an external engine, Qt Quick 3D plugs directly into the Qt Quick scene graph, so you can mix 2D and 3D content in the same UI and control everything from QML: bindings, states, animations, and input. doc.qt.io

For many apps that “just need some 3D”—dashboards, visualizations, XR UIs, small games—this gives you a much simpler workflow than writing a custom renderer or embedding a full game engine.

Starting Simple: Built-in 3D Primitives

The easiest way to learn Qt Quick 3D is with the built-in primitive meshes. A Model type can load either a .mesh file or one of several primitives by setting source to special names like #Cube or #Sphere. doc.qt.io+1

Supported primitives include:

    • #Rectangle – a flat quad, handy as a floor, wall, or screen.
    • #Cube – a box, good for quick blocking-out of shapes.
  • #Sphere – obvious, but great for lights or markers.
  • #Cylinder
  • #Cone

Example:

Model {
      source: "#Cube"
      materials: PrincipledMaterial {
          baseColor: "red"
      }
}

With View3D, a PerspectiveCamera, some lights, and a few primitives, you can already build small scenes and prototypes.
But for anything realistic—like an old bar interior or a detailed UFO—you usually want pre-modeled assets created in tools such as Blender or Maya.

From Primitives to Real Scenes with Pre-Modeled Assets

Qt Quick 3D supports importing 3D models from standard interchange formats like glTF 2.0, FBX, OBJ, and others. These assets typically include:

  • geometry (mesh)
  • multiple materials
  • texture maps (albedo, normal, roughness, etc.)
  • sometimes animations

The official “Qt Quick 3D Introduction with glTF Assets” guide shows exactly this: starting from a minimal green View3D, then importing the famous Sponza and Suzanne models from the glTF sample repository using Qt’s asset tools, and finally lighting and animating them. doc.qt.io

To make this efficient at runtime, assets are pre-processed into Qt’s own mesh and texture formats instead of loading raw glTF/FBX directly. That’s where Balsam comes in.

Balsam & BalsamUI: Converting 3D Assets to QML

Balsam is Qt Quick 3D’s asset import tool(usually stored in "[your installed Qt folder]\[Qt version: like 6.8.3]\msvc2022_64\bin\" folder). It takes files from DCC tools (Blender, Maya, 3ds Max, …) and converts them into:

  • a QML component (sub-scene) like qml
  • one or more .mesh files under a meshes/ directory
  • textures copied and organized under a maps/ directory qt.io+1

High-level idea:
balsam myModel.gltf# → generates:# meshes/myModel.mesh# MyModel.qml# maps/* (textures)
Inside your QML scene you simply write:
import QtQuick3D MyModel { id: modelInstance}
Qt also ships BalsamUI (balsamui), a GUI frontend where you pick the source asset and output folder, and tweak options like generating normals, LODs, or lightmap UVs. doc.qt.io+1
Supported formats include OBJ, FBX, COLLADA, STL, PLY and glTF2 (.gltf, .glb). doc.qt.io
So the workflow for designers and developers becomes:
     1. Model & texture in your DCC tool.
     2. Export as glTF (or FBX/OBJ…).
     3. Run balsamui (or balsam) to generate QML + meshes + textures.
     4. Instantiate the generated QML type inside your Qt Quick 3D scene.

Example: An Old Bar with a Floating UFO

Let’s put everything together with a small sample: a walkable old bar scene with a hovering UFO that always stays in front of the camera, rotates, and emits light.
We’ll use two Sketchfab models (downloaded in glTF format):

Make sure you respect each asset’s license when you download and ship them.

Step 1 – Skeleton QML App

First we create a minimal Qt Quick application with a single Window and a View3D:

import QtQuick
import QtQuick3D
import QtQuick3D.Helpers

Window {
              width: 1024
              height: 768
              visible: true
              title: qsTr("3D Model example")

              View3D {
                    anchors.fill: parent
                    environment: SceneEnvironment {
                          backgroundMode: SceneEnvironment.SkyBox
                    }

                    PerspectiveCamera {
                          id: camera
                    }

                    WasdController {
                          controlledObject: camera
                    }
        }
}

This is very similar to the “skeleton application” shown in the Qt glTF asset intro article: a View3D, a camera, and a WasdController so we can fly around the scene. doc.qt.io

Step 2 – Convert the Bar and UFO with BalsamUI

  1. Download the Old Bar and UFO models from Sketchfab as glTF.
  2. Start balsamui (it ships with Qt Quick 3D).
  3. In balsamui:
    • Choose the input file, e.g. gltf.
    • Set an output directory inside your project, e.g. assets/bar/.
    • Click Convert.
  4. Repeat for the UFO glTF file.

For each asset you’ll get something like:

  • qml (or a name based on the source file)
  • meshes/Bar.mesh
  • maps/* textures

and similarly for UFO.qml.
These QML files are sub-scenes: self-contained node trees with models, materials and textures that you can instantiate inside any View3D. doc.qt.io+1
Place them in your project (for example in the same directory as main.qml) so that QML can find them by name.

Step 3 – Instantiating the Converted Models

Now we pull those generated components into our scene.

  • Bar becomes the environment (room).
  • UFO is a smaller object floating in front of the camera.

You already prepared a final QML; here it is as the complete sample:

import QtQuick
import QtQuick3D
import QtQuick3D.Helpers 

Window {
    width: 1024
    height: 768
    visible: true

    title: qsTr("3D Model example")
    View3D {
        anchors.fill: parent
       
        environment: SceneEnvironment {
            backgroundMode: SceneEnvironment.SkyBox
        }

        PerspectiveCamera {
            id: camera
            y: 650
            z: 200

            Node { 
                id: ufoAnchor 
                y: -30        // below eye level
                z: -150       // distance in front

                Node {
                    id: ufoRig

                    // UFO rotates around itself
                    PropertyAnimation on eulerRotation.y {
                        from: 0
                        to: 360
                        duration: 8000
                        loops: Animation.Infinite

                    }

                    UFO {
                        id: ufo
                        scale: Qt.vector3d(4, 4, 4)
                    }

                    PointLight {
                        id: ufoFillLight
                        y: 0
                        color: "#fff2c0"
                        brightness: 50
                        castsShadow: true
                        shadowFactor: 60
                    }
                } 
            }
        }

        Bar {
            scale: Qt.vector3d(100, 100, 100)
        }

        WasdController {
            controlledObject: camera
        }
    }
}

Output of this sample application looks like below image:

Walking Through the QML

Let’s briefly describe each important item in this QML:

Window

The top-level application window:

  • Fixed size 1024 × 768 for simplicity.
  • Contains a single View3D that fills the entire area.

View3D

The 3D viewport where our bar and UFO live:

  • fill: parent – covers the whole window.
  • Has an environment with SkyBox. In a real app you can assign a light probe / HDR sky texture for reflections and ambient lighting.

SceneEnvironment

Controls the global rendering environment:

  • Here we only set backgroundMode: SkyBox, but it’s also where you can enable image-based lighting, fog, post-processing effects, etc.

PerspectiveCamera

Our player camera:

  • Positioned at y: 650, z: 200 to stand inside the bar at a reasonable height.
  • Acts as the parent for the UFO anchor, so when the camera moves or rotates, the UFO follows.

ufoAnchor (Node)

  • Node under the camera that defines where the UFO is relative to the camera.
  • y: -30 moves the UFO slightly below eye level.
  • z: -150 places the UFO 150 units in front of the camera (Qt Quick 3D cameras look along the negative Z axis).

Because this node is a child of the camera, if you walk around with WASD or look around with the mouse, the UFO stays fixed in front of you like a HUD element in 3D space.

ufoRig (Node + PropertyAnimation)

  • Holds the actual UFO model and its light.
  • Has a PropertyAnimation on y that continuously rotates from 0 to 360 degrees in 8 seconds, looping forever.
  • That means the UFO rotates around its own vertical axis like a hovering saucer.

UFO (generated component)

  • This is the QML component generated by Balsam/BalsamUI from the UFO glTF file.
  • Inside it there will be one or more Model nodes, materials, textures, etc. – all created by the import tool.
  • Here we simply set scale: Qt.vector3d(4, 4, 4) to enlarge it to match the bar’s scale.

PointLight ufoFillLight

  • A point light attached to ufoRig, so it moves and rotates with the UFO.
  • Gives a warm glow (color: "#fff2c0") with moderate brightness; enough to make the UFO and surrounding surfaces visible.
  • castsShadow: true + shadowFactor: 60 produce nice dynamic shadows from the UFO onto the bar interior.

This, combined with emissive materials on the UFO windows (optional extra), creates the feeling that the light comes from the craft itself.

Bar (generated component)

  • The bar environment, generated via Balsam from the “Old Bar” glTF file.
  • scale: Qt.vector3d(100, 100, 100) enlarges it so that the heigh/width feels natural when walking around with WASD, similar to how the Qt glTF intro example scales Sponza by 100. qt.io

WasdController

  • Convenience helper from Helpers.
  • Handles keyboard + mouse controls:
    • WASD / RF keys for moving forward/back/left/right/up/down.
    • Mouse to look around (when grabbed).
  • We simply point it at our camera with controlledObject: camera.

Conclusion

In this small scene we covered the full typical pipeline:

  1. Start from a simple View3D + camera + controller.
  2. Import detailed assets from DCC tools using Balsam/BalsamUI.
  3. Instantiate the generated QML components (Bar, UFO) directly in the scene.
  4. Use Qt Quick 3D’s usual QML features—nodes, property bindings, animations, lights—to make it interactive and alive.

From here you can expand with:

  • more lights and reflection probes,
  • UI overlays in Qt Quick 2D on top of the 3D view,
  • XR support via Xr,
  • or runtime asset loading using RuntimeLoader when you really need user-provided models.

References:

https://doc.qt.io/qt-6/qtquick3d-index.html

https://doc.qt.io/qt-6/qml-qtquick3d-model.html

https://doc.qt.io/qt-6/quick3d-asset-intro.html

https://doc.qt.io/qt-6/qtquick3d-tool-balsam.html

https://sketchfab.com/3d-models/old-bar-bab28c8336f944afad0cc759d7f5ec0b
https://sketchfab.com/3d-models/ufo-flying-saucer-spaceship-ovni-094ce2baf6ee40aa8f083b7d0fcf0a9f

Ready to get started?

Contact IVC for a free consultation and discover how we can help your business grow online.

Contact IVC for a Free Consultation
View More
TECH

December 2, 2025

How to Master WPF Resource Dictionaries for Better UI Styling

Managing styles in a growing desktop application can be difficult. The most effective solution to this problem is using WPF Resource Dictionaries. By decoupling your UI logic from your code, you can create applications that are modular, easier to extend, and ready for advanced features like theming. [Learn more about WPF Overview here]

WPF offers one of the most powerful styling systems among desktop UI frameworks. However, a "God-file" App.xaml with 2,000 lines of code is a maintenance nightmare. In this guide, we will build a professional styling architecture from scratch using WPF Resource Dictionaries.

Why Use WPF Resource Dictionaries?

Organizing styles into dedicated files isn't just about aesthetics; it is about engineering a solid foundation. Implementing WPF Resource Dictionaries properly offers several key advantages:

  • Maintainability: Your App.xaml remains a clean entry point instead of a dumping ground.

  • Modularity: Styles are grouped by context (e.g., ButtonStyles.xaml, FormStyles.xaml).

  • Reusability: You can copy your Styles folder to a new project and immediately have your custom branding.

  • Scalability: This structure supports complex features like "Dark Mode" much better than a single monolithic file.

Structure Your Project

First, let’s establish a clean directory structure. Inside your project, create a new folder named Styles.

Your Solution Explorer should look like this:

project structure

Define Your Color Palette

Before styling buttons, we should define our colors. Defining them centrally in **WPF Resource Dictionaries** prevents "magic hex codes" (like #2D89EF) from being scattered all over your code.

Create Styles/Colors.xaml:

```xml
<ResourceDictionary xmlns="http://schemas.microsoft.com/winfx/2006/xaml/presentation"
                    xmlns:x="http://schemas.microsoft.com/winfx/2006/xaml">

    <Color x:Key="PrimaryColor">#2D89EF</Color>
    <Color x:Key="PrimaryHoverColor">#2b73c4</Color>
    <Color x:Key="DisabledColor">#CCCCCC</Color>

    <SolidColorBrush x:Key="PrimaryBrush" Color="{StaticResource PrimaryColor}"/>
    <SolidColorBrush x:Key="PrimaryHoverBrush" Color="{StaticResource PrimaryHoverColor}"/>
    <SolidColorBrush x:Key="DisabledBrush" Color="{StaticResource DisabledColor}"/>
    <SolidColorBrush x:Key="TextBrush" Color="#333333"/>
</ResourceDictionary>

Create a Custom Button Style

Now, let's create a button that uses the colors we defined above. We will add a ControlTemplate to change the shape. Additionally, Triggers will be used to handle Hover and Pressed states smoothly.

Create Styles/ButtonStyles.xaml:

XML
<ResourceDictionary xmlns="http://schemas.microsoft.com/winfx/2006/xaml/presentation"
                    xmlns:x="http://schemas.microsoft.com/winfx/2006/xaml">

    <Style TargetType="Button" x:Key="PrimaryButton">
        <Setter Property="Background" Value="{StaticResource PrimaryBrush}"/>
        <Setter Property="Foreground" Value="White"/>
        <Setter Property="Padding" Value="15 8"/>
        <Setter Property="FontSize" Value="14"/>
        <Setter Property="BorderThickness" Value="0"/>
        <Setter Property="Cursor" Value="Hand"/>
        
        <Setter Property="Template">
            <Setter.Value>
                <ControlTemplate TargetType="Button">
                    <Border x:Name="border"
                            Background="{TemplateBinding Background}" 
                            CornerRadius="4"
                            SnapsToDevicePixels="True">
                        <ContentPresenter VerticalAlignment="Center"
                                          HorizontalAlignment="Center"
                                          Margin="{TemplateBinding Padding}"/>
                    </Border>
                    
                    <ControlTemplate.Triggers>
                        <Trigger Property="IsMouseOver" Value="True">
                            <Setter TargetName="border" Property="Background" Value="{StaticResource PrimaryHoverBrush}"/>
                        </Trigger>
                        <Trigger Property="IsPressed" Value="True">
                             <Setter TargetName="border" Property="Opacity" Value="0.8"/>
                        </Trigger>
                        <Trigger Property="IsEnabled" Value="False">
                            <Setter TargetName="border" Property="Background" Value="{StaticResource DisabledBrush}"/>
                            <Setter Property="Foreground" Value="#666666"/>
                            <Setter Property="Cursor" Value="Arrow"/>
                        </Trigger>
                    </ControlTemplate.Triggers>
                </ControlTemplate>
            </Setter.Value>
        </Setter>
    </Style>
</ResourceDictionary>

Key Detail: Notice the use of ControlTemplate.Triggers. This allows us to target specific elements inside the template (like the Border named "border") for visual updates.

Create a TextBox Style

TextBoxes often require specific structural elements to function correctly. Therefore, the template is slightly more complex.

Create Styles/TextBoxStyles.xaml:

XML
<ResourceDictionary xmlns="http://schemas.microsoft.com/winfx/2006/xaml/presentation"
                    xmlns:x="http://schemas.microsoft.com/winfx/2006/xaml">

    <Style TargetType="TextBox" x:Key="RoundedTextBox">
        <Setter Property="Padding" Value="5"/>
        <Setter Property="FontSize" Value="14"/>
        <Setter Property="Foreground" Value="{StaticResource TextBrush}"/>
        <Setter Property="BorderBrush" Value="#AAAAAA"/>
        <Setter Property="BorderThickness" Value="1"/>
        <Setter Property="Background" Value="White"/>
        <Setter Property="VerticalContentAlignment" Value="Center"/>
        
        <Setter Property="Template">
            <Setter.Value>
                <ControlTemplate TargetType="TextBox">
                    <Border x:Name="border"
                            CornerRadius="4"
                            BorderBrush="{TemplateBinding BorderBrush}"
                            BorderThickness="{TemplateBinding BorderThickness}"
                            Background="{TemplateBinding Background}">
                        <ScrollViewer x:Name="PART_ContentHost" Margin="0"/>
                    </Border>
                    
                    <ControlTemplate.Triggers>
                        <Trigger Property="IsKeyboardFocused" Value="True">
                            <Setter TargetName="border" Property="BorderBrush" Value="{StaticResource PrimaryBrush}"/>
                            <Setter TargetName="border" Property="BorderThickness" Value="2"/>
                        </Trigger>
                    </ControlTemplate.Triggers>
                </ControlTemplate>
            </Setter.Value>
        </Setter>
    </Style>
</ResourceDictionary>

Why PART_ContentHost? In the template above, the ScrollViewer named PART_ContentHost is essential. It tells WPF where the actual text goes. If you omit this, your TextBox will not display text. [Internal Link: Learn more about XAML Naming Conventions]

Merging WPF Resource Dictionaries

This is the most critical step. Styles defined in separate files are invisible until they are merged into the application scope.

Open App.xaml:

XML
<Application x:Class="MyWpfApp.App"
             xmlns="http://schemas.microsoft.com/winfx/2006/xaml/presentation"
             xmlns:x="http://schemas.microsoft.com/winfx/2006/xaml"
             StartupUri="MainWindow.xaml">
    <Application.Resources>
        <ResourceDictionary>
            <ResourceDictionary.MergedDictionaries>
                <ResourceDictionary Source="Styles/Colors.xaml"/>
                <ResourceDictionary Source="Styles/ButtonStyles.xaml"/>
                <ResourceDictionary Source="Styles/TextBoxStyles.xaml"/>
            </ResourceDictionary.MergedDictionaries>
        </ResourceDictionary>
    </Application.Resources>
</Application>

Note on Order: The order matters! Since ButtonStyles.xaml uses resources defined in Colors.xaml, Colors.xaml must be listed above it.

Using the Styles

Now that everything is wired up, using the styles in your Views (MainWindow.xaml or UserControls) is simple.

Explicit Usage

Use the x:Key you defined.

XML
<StackPanel Margin="20" Spacing="10">
    <Button Content="Save Changes" 
            Style="{StaticResource PrimaryButton}" 
            Width="150"/>
    <TextBox Style="{StaticResource RoundedTextBox}" 
             Width="250"/>
    <Button Content="Cannot Click Me" 
            Style="{StaticResource PrimaryButton}" 
            IsEnabled="False"/>
</StackPanel>

Implicit Usage (Global Defaults)

If you want every button in your app to look like this without typing Style="{...}" every time, you can create an implicit style. Add this to Styles/GlobalStyles.xaml:

XML
<Style TargetType="Button" BasedOn="{StaticResource PrimaryButton}"/>

Summary & Best Practices

Refactoring your UI with WPF Resource Dictionaries is a hallmark of professional development. Here is a checklist for success:

  1. Logical Separation: Keep specific control styles in their own files.

  2. Centralize Colors: Always use a Colors.xaml or Brushes.xaml.

  3. Use BasedOn: When creating variations, use BasedOn so you avoid rewriting the template.

  4. Static vs Dynamic: Use StaticResource for performance. Only use DynamicResource if you plan to change the resource while the app is running.

By following this pattern, you build a WPF application that is not only beautiful but also clean, organized, and easy to maintain. Happy coding!

References

Ready to get started?

Contact IVC for a free consultation and discover how we can help your business grow online.

Contact IVC for a Free Consultation
View More
TECH

December 2, 2025

Python Vectorization: Speed Up Code by 10x

In the Python world, for loops are our bread and butter. They are readable and fit the way we think about logic: process one item, then the next.

  • Process User A -> Done.
  • Process Order B -> Done.

This "row-by-row" thinking works great for complex business logic. However, I recently encountered a scenario where this approach became a bottleneck. I needed to perform simple calculations on a large dataset (10 million records), and I realized my standard approach was leaving performance on the table.

This post shares how I learned to stop looping and start vectorizing, reducing execution time significantly.

The Comfort Zone: The "Universal Loop"

Let's look at a simple problem: Calculate the sum of squares for the first 10 million integers.

Thinking procedurally, the most natural solution is to iterate through the range and add up the results.

import time

def sum_squares_loop(n):
    result = 0
    for i in range(n):
        result += i * i
    return result

# Running with 10 million records
N = 10_000_000
start_time = time.time()
print(f"Result: {sum_squares_loop(N)}")
print(f"Execution Time (Loop): {time.time() - start_time:.4f} seconds")

The Reality Check:

Running this on Python 3.11, it takes about 0.34 seconds.

You might say: "0.34 seconds is fast enough!" And for a single run, you are right. Python 3.11 has done an amazing job optimizing loops compared to older versions.

But what if you have to run this calculation 100 times a second? Or what if the dataset grows to 1 billion rows? That "fast enough" loop quickly becomes a bottleneck.

The Shift: Thinking in Sets (Vectorization)

To optimize this, we need to change our mental model. Instead of telling the CPU: "Take number 1, square it. Take number 2, square it...", we want to say: "Take this entire array of numbers and square them all at once."

This is called Vectorization.

By using a library like NumPy, we can push the loop down to the C layer, where it's compiled and optimized (often utilizing CPU SIMD instructions).

Here is the same logic, rewritten:

import numpy as np
import time

def sum_squares_vectorized(n):
    # Create an array of integers from 0 to n-1
    arr = np.arange(n)
    # The operation is applied to the entire array at once
    return np.sum(arr * arr)

# Running with 10 million records
N = 10_000_000
start_time = time.time()
print(f"Result: {sum_squares_vectorized(N)}")
print(f"Execution Time (Vectorized): {time.time() - start_time:.4f} seconds")

The Result: This runs in roughly 0.036 seconds.

Performance Comparison

Method Execution Time Relative Speed
Standard For Loop (Python 3.11) ~0.340s 1x
Vectorized Approach ~0.036s ~10x

We achieved a 10x speedup simply by changing how we access and process the data.

A Crucial Observation: The Cost of Speed

If you run the code above closely, you might notice something strange: The results might differ.

  • Python Loop: Returns the correct, massive number (≈ 3.3 × 10²⁰).
  • Vectorized (NumPy): Might return a smaller or negative number (due to overflow).

Why?

This highlights a classic engineering trade-off: Safety vs. Speed.

  • Python Integers are arbitrary-precision objects. They can grow infinitely to hold any number, but they are heavy and slow to process.
  • NumPy Integers are fixed-size (usually int64 like in C). They are incredibly fast because they fit perfectly into CPU registers, but they can overflow if the number gets too big.

The takeaway: In this benchmark, we are measuring the engine speed, not checking the math homework. When using vectorized tools in production, always be mindful of your data types (e.g., using float64 or object if numbers are astronomical)!

Lessons for Scalable Software

While NumPy is a specific tool, the concept of Set-based operations applies everywhere in software engineering, from database queries to backend APIs.

  1. Batch Your Database Queries:
    Avoid the "N+1 problem" (looping through a list of IDs and querying the DB for each one). Instead, use WHERE id IN (...) to fetch everything in a single set-based query.
  2. Minimize Context Switching:
    Every time your code switches layers (App <-> DB, Python <-> C), there is a cost. Vectorization minimizes this cost by processing data in chunks rather than single items.

Conclusion

Loops are an essential part of programming, but they aren't always the right tool for the job. When performance matters, especially with large collections of data, try to think in sets rather than steps.

It’s a small shift in mindset that pays huge dividends in performance.

[References]

https://wiki.python.org/moin/PythonSpeed/PerformanceTips

https://realpython.com/numpy-array-programming/

Ready to get started?

Contact IVC for a free consultation and discover how we can help your business grow online.

Contact IVC for a Free Consultation
View More
TECH

December 2, 2025

Master Mermaid in VS Code: The Ultimate Guide to Diagrams as Code

If you want to quickly turn ideas into visual diagrams directly inside your code editor—or illustrate complex system architectures without opening external tools—Mermaid is exactly what you need.
This guide will help you understand what Mermaid is, why it’s useful, and how to use it effectively inside Visual Studio Code (VS Code).

What Is Mermaid?

Mermaid is a JavaScript-based tool that allows you to create diagrams using plain text. Instead of dragging and dropping shapes like traditional diagramming tools, you simply write a concise text description and Mermaid renders it into a complete diagram.

Key Advantages of Mermaid

  • Text to Graphics: Write simple syntax and get a visual diagram instantly.
  • Diagrams as Code: Your diagrams stay version-controlled along with source code.
  • Markdown-Friendly: Works seamlessly with README files, technical documentation, and internal wiki pages.
  • No Extra Tools Needed: Everything is generated from text—no manual drawing required.

Think of Mermaid as an “automatic renderer”: you write the script, and it generates the scene for you.

Why Use Mermaid in VS Code?

VS Code is one of the most widely used development environments today. Integrating Mermaid into your workflow brings several benefits:

Faster Workflow

No need to switch between VS Code and external tools like Draw.io or Lucidchart.

Better Visualization

Flowcharts, sequence diagrams, workflows, and architecture diagrams can be previewed directly inside Markdown.

Easy Sharing

Just share your .md or .mmd file—anyone with VS Code can preview the diagram.

How to Use Mermaid in VS Code

Mermaid works in VS Code with the help of a few extensions. Below are the most common and convenient ways to use it.

Install the Required Extension

To render Mermaid diagrams directly inside Markdown (.md) files, you need the extension:

👉 Markdown Preview Mermaid Support

Installation Steps:

  1. Open VS Code.
  2. Press Ctrl + Shift + X to open the Extensions panel.
  3. Search for Markdown Preview Mermaid Support.
  4. Click Install.

Once installed, you can write Mermaid diagrams in any Markdown file like this:

mermaid

flowchart TD

    A[Start] --> B[Process]

    B --> C[End]

Open preview using Ctrl + Shift + V.

Use .mmd Files (Optional)

If you prefer to separate diagrams from your documentation, you can use dedicated Mermaid files (.mmd).

Example diagram.mmd:

sequenceDiagram

    Alice->>Bob: Hello Bob, how are you?

    Bob-->>Alice: I am good, thanks!

To preview .mmd files, you need an additional extension:

👉 Live Preview: Mermaid (or any similar Mermaid preview extension)

After installation:

  • Right-click the .mmd file
  • Select Open Preview

Use Live Preview (Advanced Option)

For real-time editing and instant visual feedback, use the Live Preview feature:

  1. Press Ctrl + Shift + P.
  2. Type Mermaid: Live Preview.
  3. Select the command to open the preview window.

This is especially useful when designing complex diagrams.

Conclusion

Mermaid streamlines the entire diagramming process by transforming manual drawing into automated, text-based visualization. When combined with VS Code, it allows you to:

  • manage diagrams as part of your codebase,
  • maintain version history,
  • and create clear, maintainable technical documentation.

Start by adding a simple diagram to your project’s README.md. Very quickly, you’ll see how powerful and convenient the diagrams-as-code approach can be.


Ready to get started?

Contact IVC for a free consultation and discover how we can help your business grow online.

Contact IVC for a Free Consultation


View More
TECH

December 2, 2025

Master the Art of Writing Effective QA: The Ultimate Guide

If you’ve ever received a vague or confusing answer to a question, you know how frustrating it can be. In software development, clear communication through Q&A (Questions and Answers) is essential for efficiency, accuracy, and smooth collaboration.

This guide provides a practical framework for writing Q&A that leads to quick, actionable, and reliable responses—based on core principles and common mistakes to avoid.

Start with the Right Mindset: Understand Your Audience

One of the most common mistakes in Q&A communication is assuming that the recipient (your supervisor, client, or customer) fully understands your specific context. In reality, they are not directly involved in your task and cannot see the “hidden part of the iceberg.”

Rule 1: Be Specific, Not Vague

Do not assume reviewers know the underlying technical details or background. Spell out everything relevant to the question.

Rule 2: Don’t Ask “How Should I Solve It?”

When someone assigns you a task, they expect you to research, analyze, and propose a solution, not ask them to do your work for you.
Before sending a QA, investigate thoroughly and prepare your own approach—even if it’s not perfect.

The 5 Essential Components of a Good QA

A well-written QA should contain all the necessary context for the reviewer to answer without needing follow-up questions.
Include the following five elements:

1. Main Topic / Purpose

What is the question about? State the subject clearly.

2. Current Status

Describe the current situation or what you have observed.

3. Affected Scope

Specify what parts of the system are involved:
source code, modules, documents, features, etc.

4. The Question or Confirmation Needed

Ask the exact question you need answered. Avoid vague or multi-level questions.

5. Your Proposed Solution

Provide your own idea, direction, or hypothesis, even if tentative.
This demonstrates effort and helps reviewers validate quickly.

Common Pitfalls: Examples of Incomplete Descriptions

Poorly written Q&A often contain vague wording, unclear references, overly complex logic, or missing information. Below are typical examples:

Example Phrase / Type

The Problem

What You Should Confirm

Missing Description

It is unclear where the output should be displayed.

Confirm whether the output should be written to a file or displayed on the screen.

Complex Logic

Complicated logic increases the risk of misunderstanding or incorrect assumptions.

Break down the complex part clearly and confirm each piece separately.

No Clear Deadline

The deadline is not specified.

Confirm the exact date and time for submission/reporting.

No Clear Outcome

The expected result of the research or task is unknown.

Confirm when and what research output should be delivered.

Vague Reference

There may be multiple interpretations of “previous processing.”

Confirm exactly which past procedure or behavior is being referenced.

Conclusion

By structuring your Q&A with clear context (Current Status, Scope, and Proposed Solution) and avoiding vague or overly complex phrasing, you make it easy for reviewers to provide accurate answers immediately.


Ready to get started?

Contact IVC for a free consultation and discover how we can help your business grow online.

Contact IVC for a Free Consultation


View More
TECH

December 2, 2025

Common Security Mistakes Developers Often Make—and How to Avoid Them

Security is one of the most critical aspects of software development, yet it often remains an afterthought. In fast-paced "move fast and break things" environments where deadlines are tight and feature delivery takes priority, security vulnerabilities can silently slip into the codebase.

These weaknesses are more than just bugs; they are open doors leading to data breaches, system compromise, financial loss, and catastrophic reputational damage.

In this guide, we explore the top 10 security mistakes developers make, the mechanics behind them, and the actionable best practices to fix them.


Hardcoding Sensitive Information

One of the most frequent and dangerous mistakes is embedding secrets directly into source code. This includes:

  • API keys

  • Database connection strings

  • Encryption keys and salts

  • Cloud credentials (AWS/Azure/GCP keys)

Developers often do this for quick testing or convenience, but if this code is pushed to a public repository (like GitHub), automated bots will scrape and exploit these credentials within seconds.

How to Fix It

  • Use Secret Managers: Utilize dedicated services like AWS Secrets Manager, Azure Key Vault, or HashiCorp Vault.

  • Environment Variables: Store sensitive data in .env files (and ensure .env is added to your .gitignore) or environment variables, never in the actual code files.

  • Automated Scanning: Implement tools like GitGuardian or TruffleHog in your CI/CD pipeline to block commits containing secrets.


Insecure Input Handling (Injection Attacks)

Storing Passwords in Plain Text

Failing to properly sanitize or validate user input is the root cause of injection attacks.

    • SQL Injection (SQLi): Attackers manipulate database queries.

    • Command Injection: Executing arbitrary system commands.

    • NoSQL Injection: Manipulating document-oriented database queries.

If an application accepts input blindly, attackers can trick the backend into leaking data or granting administrative access.

How to Fix It

  • Parameterized Queries: Always use prepared statements or parameterized queries. Never concatenate strings to build SQL queries.

  • Use Modern ORMs: Frameworks like Entity Framework, Hibernate, or Prisma handle sanitization automatically—if used correctly.

  • Input Validation: Validate all input against a strict allowlist (whitelisting) rather than a denylist. Ensure data conforms to expected types (e.g., ensure an age field is an integer).


Missing or Weak Authentication

Authentication is the gatekeeper of your application. Weak implementation makes it trivial for attackers to break in. Common pitfalls include:

  • No rate limiting (allowing brute-force attacks).

  • Permitting weak passwords (e.g., "password123").

  • Hardcoded administrative credentials.

How to Fix It

  • MFA is Mandatory: Implement Multi-Factor Authentication (MFA) wherever possible.

  • Rate Limiting: Use tools like Redis or API Gateways to throttle login attempts and lock accounts after repeated failures.

  • Identity Providers: Don't roll your own crypto. Use established providers like Auth0, AWS Cognito, or Okta.


Broken Access Control (IDOR)

A system may verify who the user is (authentication) but fail to verify what they are allowed to do (authorization).

A common manifestation is Insecure Direct Object References (IDOR). For example, a user visits /invoice/100, changes the URL to /invoice/101, and sees someone else's invoice because the server didn't check ownership.

How to Fix It

  • Server-Side Checks: Never rely on the frontend to hide buttons. Validate permissions on every API request on the server.

  • Principle of Least Privilege (POLP): Users should only have the bare minimum permissions necessary to perform their tasks.

  • Role-Based Access Control (RBAC): Implement strict roles (Admin, Editor, Viewer) and test boundaries regularly.


Improper Error Handling

Detailed error messages are great for debugging but dangerous in production. Revealing stack traces, database schema details, or library versions gives attackers a blueprint of your system's architecture.

How to Fix It

  • Generic User Messages: Display "An unexpected error occurred" to the user, rather than "SQL Syntax Error at line 42."

  • Secure Logging: Log the detailed stack traces internally to a secure monitoring system (like Datadog or ELK Stack), but sanitize logs to ensure no PII (Personally Identifiable Information) or secrets are recorded.


Storing Passwords in Plain Text (or Weak Hashing)

Storing raw passwords is a catastrophic failure. If your database is compromised, every user account is immediately stolen. Even using outdated hashing algorithms like MD5 or SHA-1 is effectively the same as plain text due to modern computing power.

How to Fix It

  • Strong Hashing: Use adaptive hashing algorithms specifically designed for passwords, such as bcrypt, Argon2, or scrypt.

  • Salting: Ensure every password hash has a unique, random "salt" to prevent Rainbow Table attacks.

  • NIST Guidelines: Do not force periodic password rotation (which leads to weak passwords). Instead, check new passwords against lists of known breached passwords (e.g., via the Have I Been Pwned API).


Not Using HTTPS Everywhere

Sending data over unencrypted HTTP exposes users to Man-in-the-middle (MITM) attacks. Attackers can intercept session cookies, login credentials, and personal data.

How to Fix It

  • HTTPS Everywhere: Enable TLS/SSL for all environments, including development and staging. Services like Let’s Encrypt make this free and easy.

  • HSTS: specific headers (HTTP Strict Transport Security) to force browsers to interact with your site only using HTTPS.

  • Secure Cookies: Flag all cookies as Secure (HTTPS only) and HttpOnly (inaccessible to JavaScript).


Misconfigured Cloud Services

The cloud is powerful, but complex. A single toggle can leave a database exposed to the entire internet. Common issues include:

  • Publicly accessible AWS S3 buckets containing private data.

  • Open database ports (0.0.0.0/0).

  • Overly permissive IAM roles (e.g., giving an EC2 instance full Admin access).

How to Fix It

  • Infrastructure as Code (IaC): Use tools like Terraform or CloudFormation to define infrastructure securely and consistently, preventing "click-ops" errors.

  • Cloud Security Posture Management (CSPM): Use tools like AWS Trusted Advisor, Prowler, or SonarCloud to automatically scan for misconfigurations.


Using Outdated Libraries and Dependencies

Modern software is built on the backs of open-source libraries. However, Software Supply Chain attacks are on the rise. If you use a library with a known vulnerability, your application inherits that vulnerability.

How to Fix It

  • SCA Tools: Use Software Composition Analysis tools like Dependabot, Snyk, or OWASP Dependency-Check.

  • Regular Audits: Automate dependency updates. Do not use "abandonware" libraries that haven't been updated in years.

  • Lock Files: Use package-lock.json or yarn.lock to ensure consistent versions across environments.


Lack of Security Testing

Lack of Security Testing

Many teams rely solely on functional testing ("Does it work?") and skip security testing ("Is it safe?"). Security cannot be something you check only one week before launch.

How to Fix It

  • Shift Left: Integrate security early in the development lifecycle.

  • SAST & DAST: Use Static Application Security Testing (analyzing code) and Dynamic Application Security Testing (simulating attacks on the running app).

  • Penetration Testing: Hire ethical hackers to test your system periodically.


Conclusion

Security isn’t a one-time checkbox—it’s a continuous mindset that must be woven into the fabric of your development culture (DevSecOps).

By understanding these common mistakes and implementing the right tools, you can build software that is not only functional but resilient against attacks.

The Golden Rules:

  1. Trust no input.

  2. Encrypt everything.

  3. Grant the least privilege necessary.

  4. Automate your security checks.

Building secure software requires vigilance, but the cost of prevention is always lower than the cost of a breach.

References

https://cheatsheetseries.owasp.org/

https://owasp.org/www-project-top-ten/

https://owasp.org/www-project-web-security-testing-guide/

https://cheatsheetseries.owasp.org/cheatsheets/Secrets_Management_Cheat_Sheet.html

https://cheatsheetseries.owasp.org/cheatsheets/SQL_Injection_Prevention_Cheat_Sheet.html

https://cheatsheetseries.owasp.org/cheatsheets/Authentication_Cheat_Sheet.html

https://cheatsheetseries.owasp.org/cheatsheets/Password_Storage_Cheat_Sheet.html

https://cheatsheetseries.owasp.org/cheatsheets/Authorization_Cheat_Sheet.html

https://cheatsheetseries.owasp.org/cheatsheets/Transport_Layer_Protection_Cheat_Sheet.html

https://owasp.org/www-project-dependency-check/

https://docs.aws.amazon.com/wellarchitected/latest/security-pillar/

https://www.freepik.com/free-vector/hacker-activity-concept_8269019.htm

Ready to get started?

Contact IVC for a free consultation and discover how we can help your business grow online.

Contact IVC for a Free Consultation
View More
TECH

December 2, 2025

Master DynamoDB Pagination in C#: The Ultimate Guide to Navigation

Traditional offset-based pagination (using SKIP and TAKE) isn't viable in DynamoDB due to performance constraints. Instead, DynamoDB uses cursor-based pagination through LastEvaluatedKey, which acts as a pointer to the next page.

While navigating "Next" is straightforward, implementing a full set of controls—First, Previous, Next, and Last—requires a deeper understanding of DynamoDB's architecture.

In this guide, we’ll implement a complete pagination solution in C#.

Introduction to DynamoDB Pagination

Amazon DynamoDB is a fully managed NoSQL database designed for fast, scalable, and predictable performance. When querying large datasets, DynamoDB automatically paginates results and returns up to 1 MB of data per request.

Instead of using offset-based pagination like SQL, DynamoDB uses a special value called LastEvaluatedKey. Each query response includes:

  • A page of items.

  • A LastEvaluatedKey (if more items exist).

To retrieve the next page, the client passes this key back to DynamoDB using the ExclusiveStartKey parameter. Because DynamoDB does not support random access to pages, implementing controls like Previous and Last requires applying cursor logic or manipulating the sort order.

When to Use Pagination in DynamoDB

Pagination is essential when dealing with:

  • Large datasets: Fetching thousands of items in a single request is inefficient and costly.

  • User interfaces: UI components (dashboards, tables) need friendly controls.

  • APIs returning limited result sets: Public endpoints must paginate to avoid timeouts.

  • Reducing Read Costs: Controlled queries reduce Read Capacity Units (RCU) consumption.

  • High-traffic systems: Fetching data incrementally prevents backend resource exhaustion.

The Secret Weapon: ScanIndexForward

DynamoDB allows you to navigate forward easily. However, it does not natively support "Previous" or "Last". To solve this, we utilize the ScanIndexForward parameter.

  • ScanIndexForward = true (Default): Returns items in ascending order.

  • ScanIndexForward = false: Returns items in descending order.

This feature allows us to:

Efficiently get the "Last Page"

Querying in descending order gives you the newest/last items first.

Key Concept: The first page of a descending query is effectively the last page of an ascending query.

Support Backward Pagination

When moving backward, using reverse sort order allows us to fetch items preceding the current batch without scanning the entire table.

Note: This technique requires your Table or GSI to have a Sort Key defined.

Implementing Pagination (C# Example)

Below is a reusable pagination structure supporting First, Next, Previous, and Last.

Important: Handling State in Web APIs

Before looking at the code, note that in a stateless environment (like a REST API), you cannot store the PagingState object in server memory. You must serialize the state (e.g., to a Base64 JSON string) and send it to the client. The client must then send this token back in the next request.

Models

C#
using Amazon.DynamoDBv2.Model;

// Represents the result of a paginated query
public class PageResult
{
    // List of DynamoDB items returned for this page
    public List<Dictionary<string, AttributeValue>> Items { get; set; }

    // Cursor pointing to the next page (null if no more pages)
    public Dictionary<string, AttributeValue>? NextKey { get; set; }

    // Number of items per page
    public int PageSize { get; set; }
}

// Stores the pagination state for navigating Next/Previous
public class PagingState
{
    // Stack of previous page tokens -> used to move backwards
    // In a Web API, this list should be serialized and sent to the client
    public Stack<Dictionary<string, AttributeValue>?> PrevTokens { get; set; } = new();

    // Token used to load the current page
    public Dictionary<string, AttributeValue>? CurrentToken { get; set; }

    // Token used to load the next page
    public Dictionary<string, AttributeValue>? NextToken { get; set; }
}

Base Query Method

This generic method handles the core DynamoDB query logic.

C#
public async Task<PageResult> QueryPageAsync(
    string userType,
    Dictionary<string, AttributeValue>? startKey,
    int pageSize,
    bool scanForward = true)
{
    var request = new QueryRequest
    {
        TableName = "Users",
        // Partition key condition
        KeyConditionExpression = "UserType = :u",
        ExpressionAttributeValues = new Dictionary<string, AttributeValue>
        {
            {":u", new AttributeValue { S = userType }}
        },
        // Cursor for next page (null for first page)
        ExclusiveStartKey = startKey,
        // Maximum items to return
        Limit = pageSize,
        // Sorting direction: true = ascending, false = descending
        ScanIndexForward = scanForward
    };

    var response = await _client.QueryAsync(request);

    return new PageResult
    {
         Items = response.Items,
         NextKey = response.LastEvaluatedKey,
         PageSize = pageSize
    };
}

First Page

C#
public async Task<PageResult> GetFirstPageAsync(string userType, int pageSize, PagingState state)
{
    // Clear backward history as we are starting over
    state.PrevTokens.Clear();
    state.CurrentToken = null;

    // Load first page in ascending order
    var result = await QueryPageAsync(userType, null, pageSize, scanForward: true);
    // Store next page cursor
    state.NextToken = result.NextKey;
    return result;
}

Next Page

C#
public async Task<PageResult> GetNextPageAsync(string userType, int pageSize, PagingState state)
{
    // Check if there are more pages
    if (state.NextToken == null)
        return new PageResult { Items = new(), NextKey = null };

    // Save current token to history so we can navigate backwards later
    state.PrevTokens.Push(state.CurrentToken);

    // Move forward
    state.CurrentToken = state.NextToken;
    // Load next page
    var result = await QueryPageAsync(userType, state.CurrentToken, pageSize);
    state.NextToken = result.NextKey;
    return result;
}

Previous Page

C#
public async Task<PageResult> GetPreviousPageAsync(string userType, int pageSize, PagingState state)
{
    // If no history, default to First Page
    if (!state.PrevTokens.Any())
        return await GetFirstPageAsync(userType, pageSize, state);

    // Retrieve the most recent previous token
    var previousKey = state.PrevTokens.Pop();
    // Update current cursor
    state.CurrentToken = previousKey;
    // Load page using the retrieved token
    var result = await QueryPageAsync(userType, previousKey, pageSize);
    state.NextToken = result.NextKey;
    return result;
}

Last Page

This is where the magic happens using ScanIndexForward = false.

C#
public async Task<PageResult> GetLastPageAsync(string userType, int pageSize)
{
    // Reverse the sort order so newest items come first
    // This effectively fetches the "Last Page" immediately
    var result = await QueryPageAsync(
        userType,
        startKey: null,
        pageSize: pageSize,
        scanForward: false); // Critical: Read backwards

    // Reorder items for UI display (so they appear Ascending within the page)
    result.Items.Reverse();

    return result;
}

Note on Navigation: Jumping directly to the "Last Page" isolates the user from the previous navigation history. The PrevTokens stack will not automatically know how to go back to the "Second to Last" page. In most UI implementations, clicking "Last" resets the navigation context.

Conclusion

DynamoDB’s cursor-based pagination offers a scalable and cost-efficient alternative to offset-based pagination. While paging forward is simple, paging backward and jumping to the last page requires creative use of sorting.

By leveraging ScanIndexForward = false, developers can:

  1. Retrieve the last page instantly (O(1) complexity).

  2. Reverse the paging direction efficiently.

  3. Reduce unnecessary read costs.

With the C# implementation provided, you now have a robust starting point for building user-friendly tables on top of DynamoDB.

References

These authoritative resources help deepen your understanding:


Ready to get started?

Contact IVC for a free consultation and discover how we can help your business grow online.

Contact IVC for a Free Consultation
View More
TECH

December 2, 2025

JWT vs. OAuth 2.0: The Ultimate Guide to Secure Authentication

In today’s API-driven world, authentication and authorization are foundational to secure application design. Modern systems—especially microservices, mobile apps, and single-page applications (SPAs)—often rely on JWT vs OAuth 2.0 to handle identity.

However, these two terms often appear together, leading to confusion. Are they competitors? Do they do the same thing?

The short answer is: No. They serve different purposes and solve different problems. This article will break down what each technology does, how they work, and when to use them effectively. 

1. What Is JWT (JSON Web Token)?

A JWT (JSON Web Token) is a compact, stateless token format used to transmit claims between parties securely.

It is an encoded (not encrypted) string containing three parts, separated by dots (.):

  1. Header

  2. Payload

  3. Signature

Example Structure: header.payload.signature

eyJhbGciOiJIUzI1NiIsInR5cCI6IkpXVCJ9.
eyJ1c2VyX2lkIjoxMjMsInJvbGUiOiJhZG1pbiJ9.
dBjftJeZ4CVP-mB92K27uhbUJU1p1r_wW1gFWFOEjXk


Key Characteristics of JWT:

  • Stateless: No need for server-side session storage (like Redis or SQL).

  • Digitally Signed: Verified using HMAC (symmetric) or RSA/ECDSA (asymmetric).

  • Custom Claims: Can contain User ID, roles, and permissions.

  • Performance: Fast to verify since no database lookup is needed.

⚠️ Common Misunderstanding:

JWTs are not encrypted by default. They are only base64-encoded. Never put sensitive information (like passwords or social security numbers) in a JWT payload unless you use JWE (JSON Web Encryption).

2. What Is OAuth 2.0?

OAuth 2.0 is an industry-standard authorization framework. It allows applications to access resources on behalf of a user without sharing credentials.

Real-world Example:

When you see “Login with Google,” that is OAuth 2.0. Google issues access tokens so your app can read the user’s email or profile without ever seeing their Google password.

Core OAuth 2.0 Roles:

  • Resource Owner: The user.

  • Client: The application requesting access.

  • Authorization Server: The server issuing tokens (e.g., Google, Okta, Auth0).

  • Resource Server: The API providing protected data.

What OAuth DOES:

  • Delegates access.

  • Defines token generation flows (Grant Types).

  • Manages user consent.

What OAuth DOESN’T Do:

  • It does not define the token structure (it can use random strings or JWTs).

  • It does not handle user authentication natively (that is handled by OpenID Connect).

3. JWT vs OAuth 2.0: The Key Differences

To clear up the confusion, here is a direct comparison:

Feature JWT OAuth 2.0
Purpose Token format (Container) Authorization framework (Protocol)
Handles Login? ❌ No ❌ No (OIDC does)
Stateless? Yes Depends on implementation
Token Type Self-contained Any (Random string or JWT)
Primary Use Information exchange Delegated authorization

Important Note:

  • JWT is NOT an authentication framework.

  • OAuth 2.0 is NOT an identity framework.

  • To authenticate users using OAuth, you need OpenID Connect (OIDC) on top.

4. How They Work Together

OAuth 2.0 can issue many token formats. JWT is simply one of them.

In modern systems, OAuth 2.0 access tokens are usually implemented as JWTs because:

  1. Self-contained: The Resource Server (API) can validate the token without calling the Authorization Server.

  2. Performance: Reduces network latency and database lookups.

  3. Scalability: Ideal for distributed microservices.

The Typical Flow:

  1. User logs in via an OAuth 2.0 Authorization Server.

  2. Server issues a JWT Access Token (+ optional Refresh Token).

  3. Client sends the JWT to the API on every request.

  4. API verifies the JWT signature and claims locally.

JWT Access Token

  • Description: A sequence diagram showing the flow: Client -> Auth Server (returns JWT) -> Client -> API (validates JWT).

  • Alt Text: OAuth 2.0 flow using JWT Access Tokens.

5. Access Token vs. Refresh Token

  • Access Token: Short-lived (e.g., 15 minutes). Sent with every API request. Usually a JWT.

  • Refresh Token: Long-lived (days/weeks). Used to obtain new access tokens when the old one expires. Never share this with the Resource Server.

6. Security Best Practices

Both technologies are powerful but dangerous if misused. Follow these rules to secure your app.

JWT Best Practices:

  • Short Expiration: Keep exp time short (5-15 mins).

  • Secure Storage: Store tokens in HttpOnly, Secure Cookies (not localStorage) to prevent XSS attacks.

  • Algorithm: Use asymmetric signing (RS256) for distributed systems.

OAuth 2.0 Best Practices:

  • PKCE: Always use Authorization Code Flow with PKCE for mobile and SPAs.

  • No Implicit Flow: Never use the deprecated Implicit Flow.

  • Least Privilege: Request only the scopes you absolutely need.

  • Token Rotation: Rotate refresh tokens upon every use to detect theft.

Conclusion

JWT and OAuth 2.0 are core technologies in modern architecture. Although they are often used together, they solve distinct problems:

  • JWT is a format for securely transmitting information.

  • OAuth 2.0 is a protocol for delegating access.

Understanding their roles will help you build secure, scalable identity systems for web, mobile, and distributed applications.

References

Ready to get started?

Contact IVC for a free consultation and discover how we can help your business grow online.

Contact IVC for a Free Consultation
View More
TECH

December 2, 2025

Using ActiveReportsJS in Next.js to Generate PDF Files from JSON Templates

Modern web applications often need to export reports as PDF files. Instead of building PDF layouts manually, ActiveReportsJS by Mescius allows developers to design report templates using a JSON format, then render these templates inside Next.js using dynamic parameters and data sources.

1. Introduction

In this article, we will explore how to use ActiveReportsJS inside a Next.js project to generate PDF documents on the server side. The workflow is simple: prepare a JSON report template, pass data and parameters to it, and let ActiveReportsJS create the final PDF file.

This approach is useful for invoices, summaries, forms, and any business reports that need flexible formatting. The content below uses common technical vocabulary and is designed for developers of all levels.

2. How ActiveReportsJS Works in a Next.js Environment

ActiveReportsJS is a client-side and server-side reporting engine. When used with Next.js API routes, it can render PDF files without exposing sensitive logic to the browser. The typical flow includes:

  • Loading a JSON report template (.rdl.json)
  • Passing parameters and dynamic data
  • Rendering the report into a PDF stream
  • Returning the file to the user

Below is a simplified example of how the process looks.

2.1 JSON Template Structure

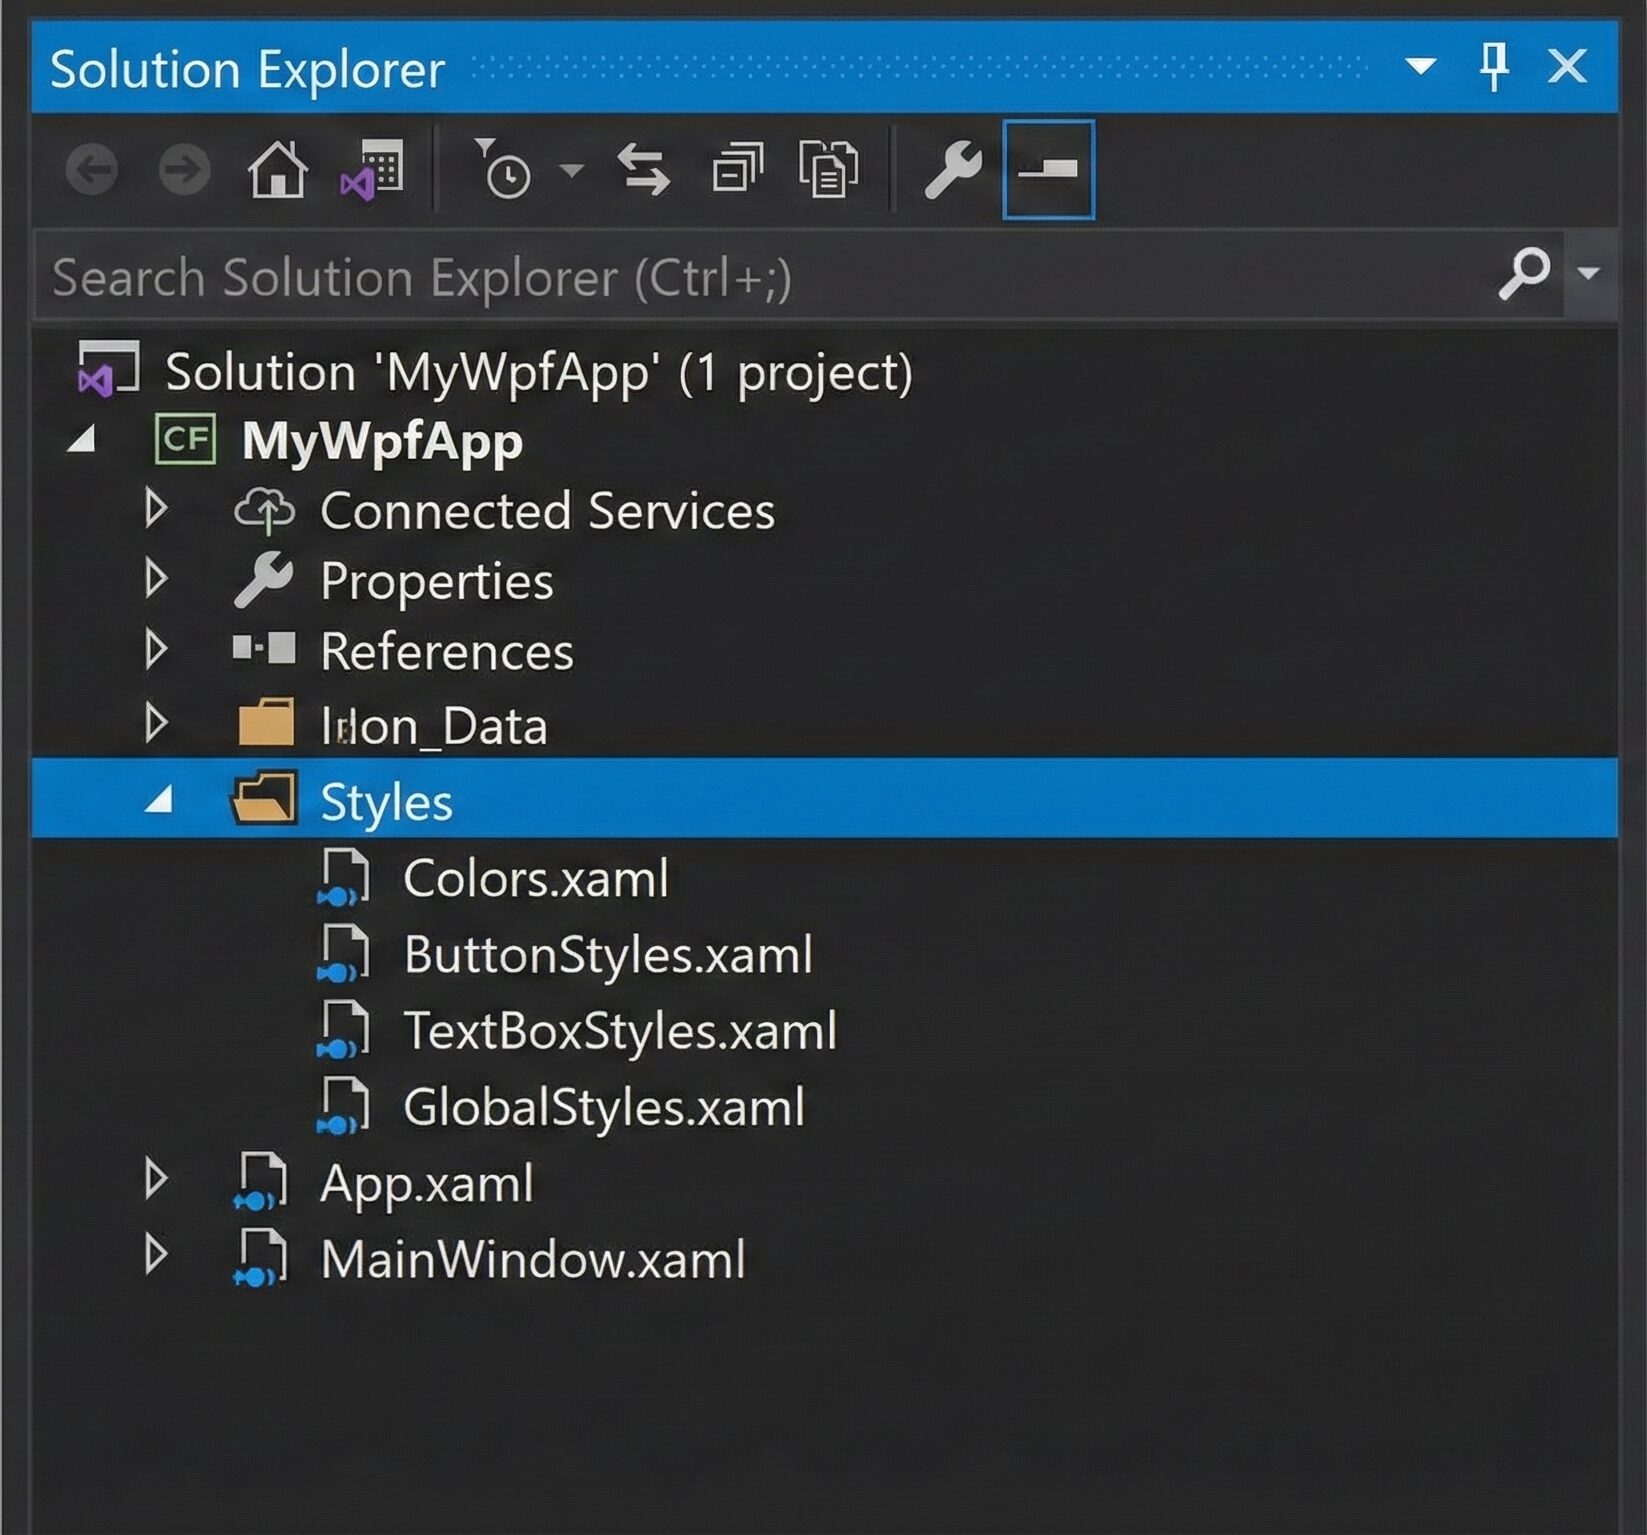
A basic ActiveReportsJS template includes layout, text boxes, and bindings. Templates are normally created using the ActiveReportsJS Designer tool.

{
  "Name": "StudentReport",
  "Type": "report",
  "DataSources": [
    {
      "Name": "ReportDataSource",
      "ConnectionProperties": {
        "DataProvider": "JSON",
        "ConnectString": "jsondata="
      }
    }
  ],
  "DataSets": [
    {
      "Name": "ReportDataSet",
      "Query": {
        "DataSourceName": "ReportDataSource",
        "CommandText": "$.value[*]"
      },
      "Fields": [
        {
          "Name": "qrcd",
          "DataField": "qrcd",
          "Type": "String"
        },
        {
          "Name": "studentId",
          "DataField": "studentId",
          "Type": "String"
        },
        {
          "Name": "ticketInfo",
          "DataField": "ticketInfo",
          "Type": "Object"
        }
      ]
    }
  ],
  "Page": {
    "PageWidth": "8.5in",
    "PageHeight": "11in",
    "Margins": {
      "Top": "0.5in",
      "Bottom": "0.5in",
      "Left": "0.5in",
      "Right": "0.5in"
    }
  },
  "Body": {
    "ReportItems": [
      {
        "Type": "textbox",
        "Name": "QrcdValue",
        "Value": "=Fields!qrcd.Value",
        "Style": {
          "FontFamily": "Noto Sans JP",
          "FontSize": "10pt"
        },
        "Top": "0.9in",
        "Left": "2in",
        "Width": "5.5in",
        "Height": "0.25in"
      },
      {
        "Type": "textbox",
        "Name": "TicketIdValue",
        "Value": "=Fields!ticketInfo.Value.ticketId",
        "Style": {
          "FontFamily": "Noto Sans JP",
          "FontSize": "10pt"
        },
        "Top": "2.3in",
        "Left": "2in",
        "Width": "5.5in",
        "Height": "0.25in"
      }
    ],
    "Height": "9.8in"
  }
}

2.2 Basic PDF Generation with Parameters

The simplest example: using parameters to inject values into the report template.

// pages/api/basic-report.ts
import { NextApiRequest, NextApiResponse } from 'next';
import { 
  outputPDFByARJ, 
  createParameter
} from '@/common/utils/sample-active-report-js';

export default async function handler(req: NextApiRequest, res: NextApiResponse) {
  try {
    const { title, author } = req.query;

    // Create simple parameters
    const parameters = [
      createParameter('reportTitle', title || 'Default Report Title'),
      createParameter('authorName', author || 'Unknown Author'),
      createParameter('generationDate', new Date().toLocaleDateString('ja-JP'))
    ];

    // Generate PDF using the utility function
    await outputPDFByARJ({
      jsonUrl: '/data/basic-report-template.json',
      fileName: `basic-report-${Date.now()}.pdf`,
      parameters
    });

  } catch (error) {
    console.error('PDF Generation Error:', error);
    res.status(500).json({ error: 'Failed to generate PDF' });
  }
}

2.3 Working with Complex Data Structures

When dealing with complex business data containing nested objects, ActiveReportsJS requires careful handling. The template in our example expects data with nested structures like ticket information, status, and procedure details.

// pages/api/generate-student-report.ts
import { NextApiRequest, NextApiResponse } from 'next';
import { 
  outputPDFByARJ, 
  createParameter,
  flattenNestedObjectToParameters 
} from '@/common/utils/sample-active-report-js';

export default async function handler(req: NextApiRequest, res: NextApiResponse) {
  try {
    const { studentId, orgCode } = req.query;

    // Sample complex data structure matching the report template
    const reportData = {
      value: [
        {
          qrcd: `QR${Date.now()}`,
          studentId: studentId || "STU001",
          orgCode: orgCode || "ORG001",
          ticketInfo: {
            ticketId: `TICKET${studentId || '001'}`,
            seatNumber: "A-001",
            facultyName: "Faculty of Arts",
            departmentName: "Design",
            categoryName: "General Admission",
            area: "Main Campus"
          },
          numberInfo: {
            number: "2024001",
            appNumber: `APP${studentId || '001234'}`,
            schoolName: "Sample High School"
          },
          resultInfo: {
            status: "Passed",
            comment: "Congratulations on your success!"
          },
          procedures: {
            fee: "$3,000",
            startDate: "2024-04-01",
            endDate: "2024-04-30"
          },
          qrCodeReference: {
            comment: "Scan for details",
            destAddress: "contact@example.com",
            destName: "Admission Office"
          }
        }
      ]
    };

    // Method 1: Using createParameter for simple values
    const simpleParams = [
      createParameter('reportTitle', 'Admission Certificate'),
      createParameter('generatedDate', new Date().toISOString().split('T')[0])
    ];

    // Method 2: Using flattenNestedObjectToParameters for complex objects
    const nestedData = {
      student: {
        name: "John Doe",
        studentId: "S2024001"
      },
      contact: {
        email: "john.doe@example.com",
        phone: "+1-555-0123"
      }
    };
    
    const flattenedParams = flattenNestedObjectToParameters(nestedData);

    // Combine all parameters
    const allParameters = [...simpleParams, ...flattenedParams];

    // Generate PDF using the utility function
    await outputPDFByARJ({
      jsonUrl: '/data/student-report-template.json', // Updated generic filename
      fileName: `report-${Date.now()}.pdf`,
      parameters: allParameters,
      data: reportData
    });

  } catch (error) {
    console.error('PDF Generation Error:', error);
    res.status(500).json({ error: 'Failed to generate PDF' });
  }
}

2.4 Client-Side Integration with React Components

Here's how to integrate PDF generation into your React components:

// components/ReportGenerator.tsx
import { useState } from 'react';
import { 
  outputPDFByARJ, 
  createParameter,
  flattenNestedObjectToParameters 
} from '@/common/utils/sample-active-report-js';

// Define interface for data structure
interface ReportData {
  qrcd: string;
  studentId: string;
  orgCode: string;
  ticketInfo: {
    ticketId: string;
    seatNumber: string;
    facultyName: string;
    departmentName: string;
    categoryName: string;
    area: string;
  };
  numberInfo: {
    number: string;
    appNumber: string;
    schoolName: string;
  };
  resultInfo: {
    status: string;
    comment: string;
  };
  procedures: {
    fee: string;
    startDate: string;
    endDate: string;
  };
  qrCodeReference: {
    comment: string;
    destAddress: string;
    destName: string;
  };
}

export const ReportGenerator = () => {
  const [isGenerating, setIsGenerating] = useState(false);
  const [studentId, setStudentId] = useState('');
  const [orgCode, setOrgCode] = useState('');

  const generateReport = async () => {
    if (!studentId || !orgCode) {
      alert('Please enter Student ID and Org Code');
      return;
    }

    setIsGenerating(true);
    try {
      // Prepare complex nested data
      const data: ReportData = {
        qrcd: `QR${Date.now()}`,
        studentId,
        orgCode,
        ticketInfo: {
          ticketId: `TICKET${studentId}`,
          seatNumber: 'A-001',
          facultyName: 'Faculty of Arts',
          departmentName: 'Design',
          categoryName: 'General Admission',
          area: 'Main Campus'
        },
        numberInfo: {
          number: studentId,
          appNumber: `APP${studentId}`,
          schoolName: 'Sample High School'
        },
        resultInfo: {
          status: 'Passed',
          comment: 'Congratulations on your success.'
        },
        procedures: {
          fee: '$3,000',
          startDate: '2024-04-01',
          endDate: '2024-04-30'
        },
        qrCodeReference: {
          comment: 'Access Link',
          destAddress: 'contact@example.com',
          destName: 'Office'
        }
      };

      // Create parameters using utility functions
      const parameters = [
        createParameter('reportTitle', 'Admission Certificate'),
        createParameter('generationTime', new Date().toLocaleString('en-US')),
        ...flattenNestedObjectToParameters({
          metadata: {
            version: '1.0',
            generatedBy: 'Report System'
          }
        })
      ];

      // Generate PDF with complex data
      await outputPDFByARJ({
        jsonUrl: '/data/student-report-template.json',
        fileName: `admission-certificate-${studentId}.pdf`,
        parameters,
        data: { value: [data] } // Wrap in { value: [...] } as expected by template
      });

      alert('PDF generated successfully!');
    } catch (error) {
      console.error('Generation failed:', error);
      alert('Failed to generate PDF. Please try again.');
    } finally {
      setIsGenerating(false);
    }
  };

  return { generateReport };
}

2.5 Understanding the outputPDFByARJ Function

Before diving into complex examples, let's understand the outputPDFByARJ function - this is the main utility function for generating PDFs from JSON templates:

/**
 * Generates and downloads a PDF file from a report definition JSON (RDL).
 * This function fetches the report layout, applies specified parameters, runs the report,
 * and then exports the result as a PDF, triggering a download in the browser.
 */
export const outputPDFByARJ = async ({
  jsonUrl,
  fileName,
  parameters,
  password,
  data,
}: OutputPdfParams): Promise => {
  // Check if running in browser environment
  if (typeof window === 'undefined') {
    console.log('PDF Output Error: Not running in browser environment');
    return;
  }

  // Helper: Temporarily neutralize i18n mutating methods to avoid vendor side-effects
  const runWithI18nPatched = async (work: () => Promise) => {
    // Save original methods
    const i18nAny = i18n as unknown as Record<string, unknown>;
    const original = {
      use: i18nAny.use,
      init: i18nAny.init,
      changeLanguage: i18nAny.changeLanguage,
      addResourceBundle: i18nAny.addResourceBundle,
      addResources: i18nAny.addResources,
      addResource: i18nAny.addResource,
      loadLanguages: i18nAny.loadLanguages,
      loadNamespaces: i18nAny.loadNamespaces,
    };

    // Patch to no-ops (non-mutating)
    i18nAny.use = () => i18n;
    i18nAny.init = () => i18n;
    i18nAny.changeLanguage = () => i18n.language;
    i18nAny.addResourceBundle = () => undefined;
    i18nAny.addResources = () => undefined;
    i18nAny.addResource = () => undefined;
    i18nAny.loadLanguages = () => undefined;
    i18nAny.loadNamespaces = () => undefined;

    try {
      await work();
    } finally {
      // Restore originals
      i18nAny.use = original.use;
      i18nAny.init = original.init;
      i18nAny.changeLanguage = original.changeLanguage;
      i18nAny.addResourceBundle = original.addResourceBundle;
      i18nAny.addResources = original.addResources;
      i18nAny.addResource = original.addResource;
      i18nAny.loadLanguages = original.loadLanguages;
      i18nAny.loadNamespaces = original.loadNamespaces;
    }
  };

  await runWithI18nPatched(async () => {
    // Dynamically import ActiveReports to avoid SSR issues
    const { Core, PdfExport } = await import(
      './wrappers/activereports-wrapper'
    );

    // Fetch the report layout from the provided URL
    const response = await fetch(jsonUrl);
    const jsonData = await response.json();

    // Modify ConnectString with JSON data
    jsonData.DataSources[0].ConnectionProperties.ConnectString = `jsondata=${JSON.stringify(data)}`;

    const fontsToRegister = [
      {
        name: 'IPA EXG',
        source: '/fonts/ipaexg.ttf',
      },
      {
        name: 'IPA EXM',
        source: '/fonts/ipaexm.ttf',
      },
    ];
    await Core.FontStore.registerFonts(...fontsToRegister);

    // Load the report definition
    const report = new Core.PageReport();
    await report.load(jsonData);

    if (!data) {
      // Normalize and apply parameters to the report
      const normalizedParameters = parameters.map((param) => ({
        ...param,
        Value: normalizeParameterValue(param.Value),
      }));

      // Apply normalized parameters to the report
      await report.reportParameters.applySteps(normalizedParameters as any);
    }

    // Run the report to generate the document
    const pageDocument = await report.run();

    // Export the document to a PDF blob and initiate download
    const pdfSettings = password
      ? { security: { userPassword: password } }
      : undefined;
    const pdfBlob = await PdfExport.exportDocument(pageDocument, pdfSettings);
    pdfBlob.download(fileName);
  });
};

Parameters of the outputPDFByARJ function:

  • jsonUrl: Path to the JSON template file
  • fileName: Output PDF file name
  • parameters: Array of parameters to pass to the report
  • password (optional): Password to protect the PDF
  • data: JSON data to bind to the report template

The function will:

  1. Fetch the JSON template from the URL
  2. Apply parameters and data
  3. Render the report into a PDF
  4. Trigger download in the browser

3. Best Practices When Using ActiveReportsJS with Next.js

  • Store report templates in a secure directory of your project.
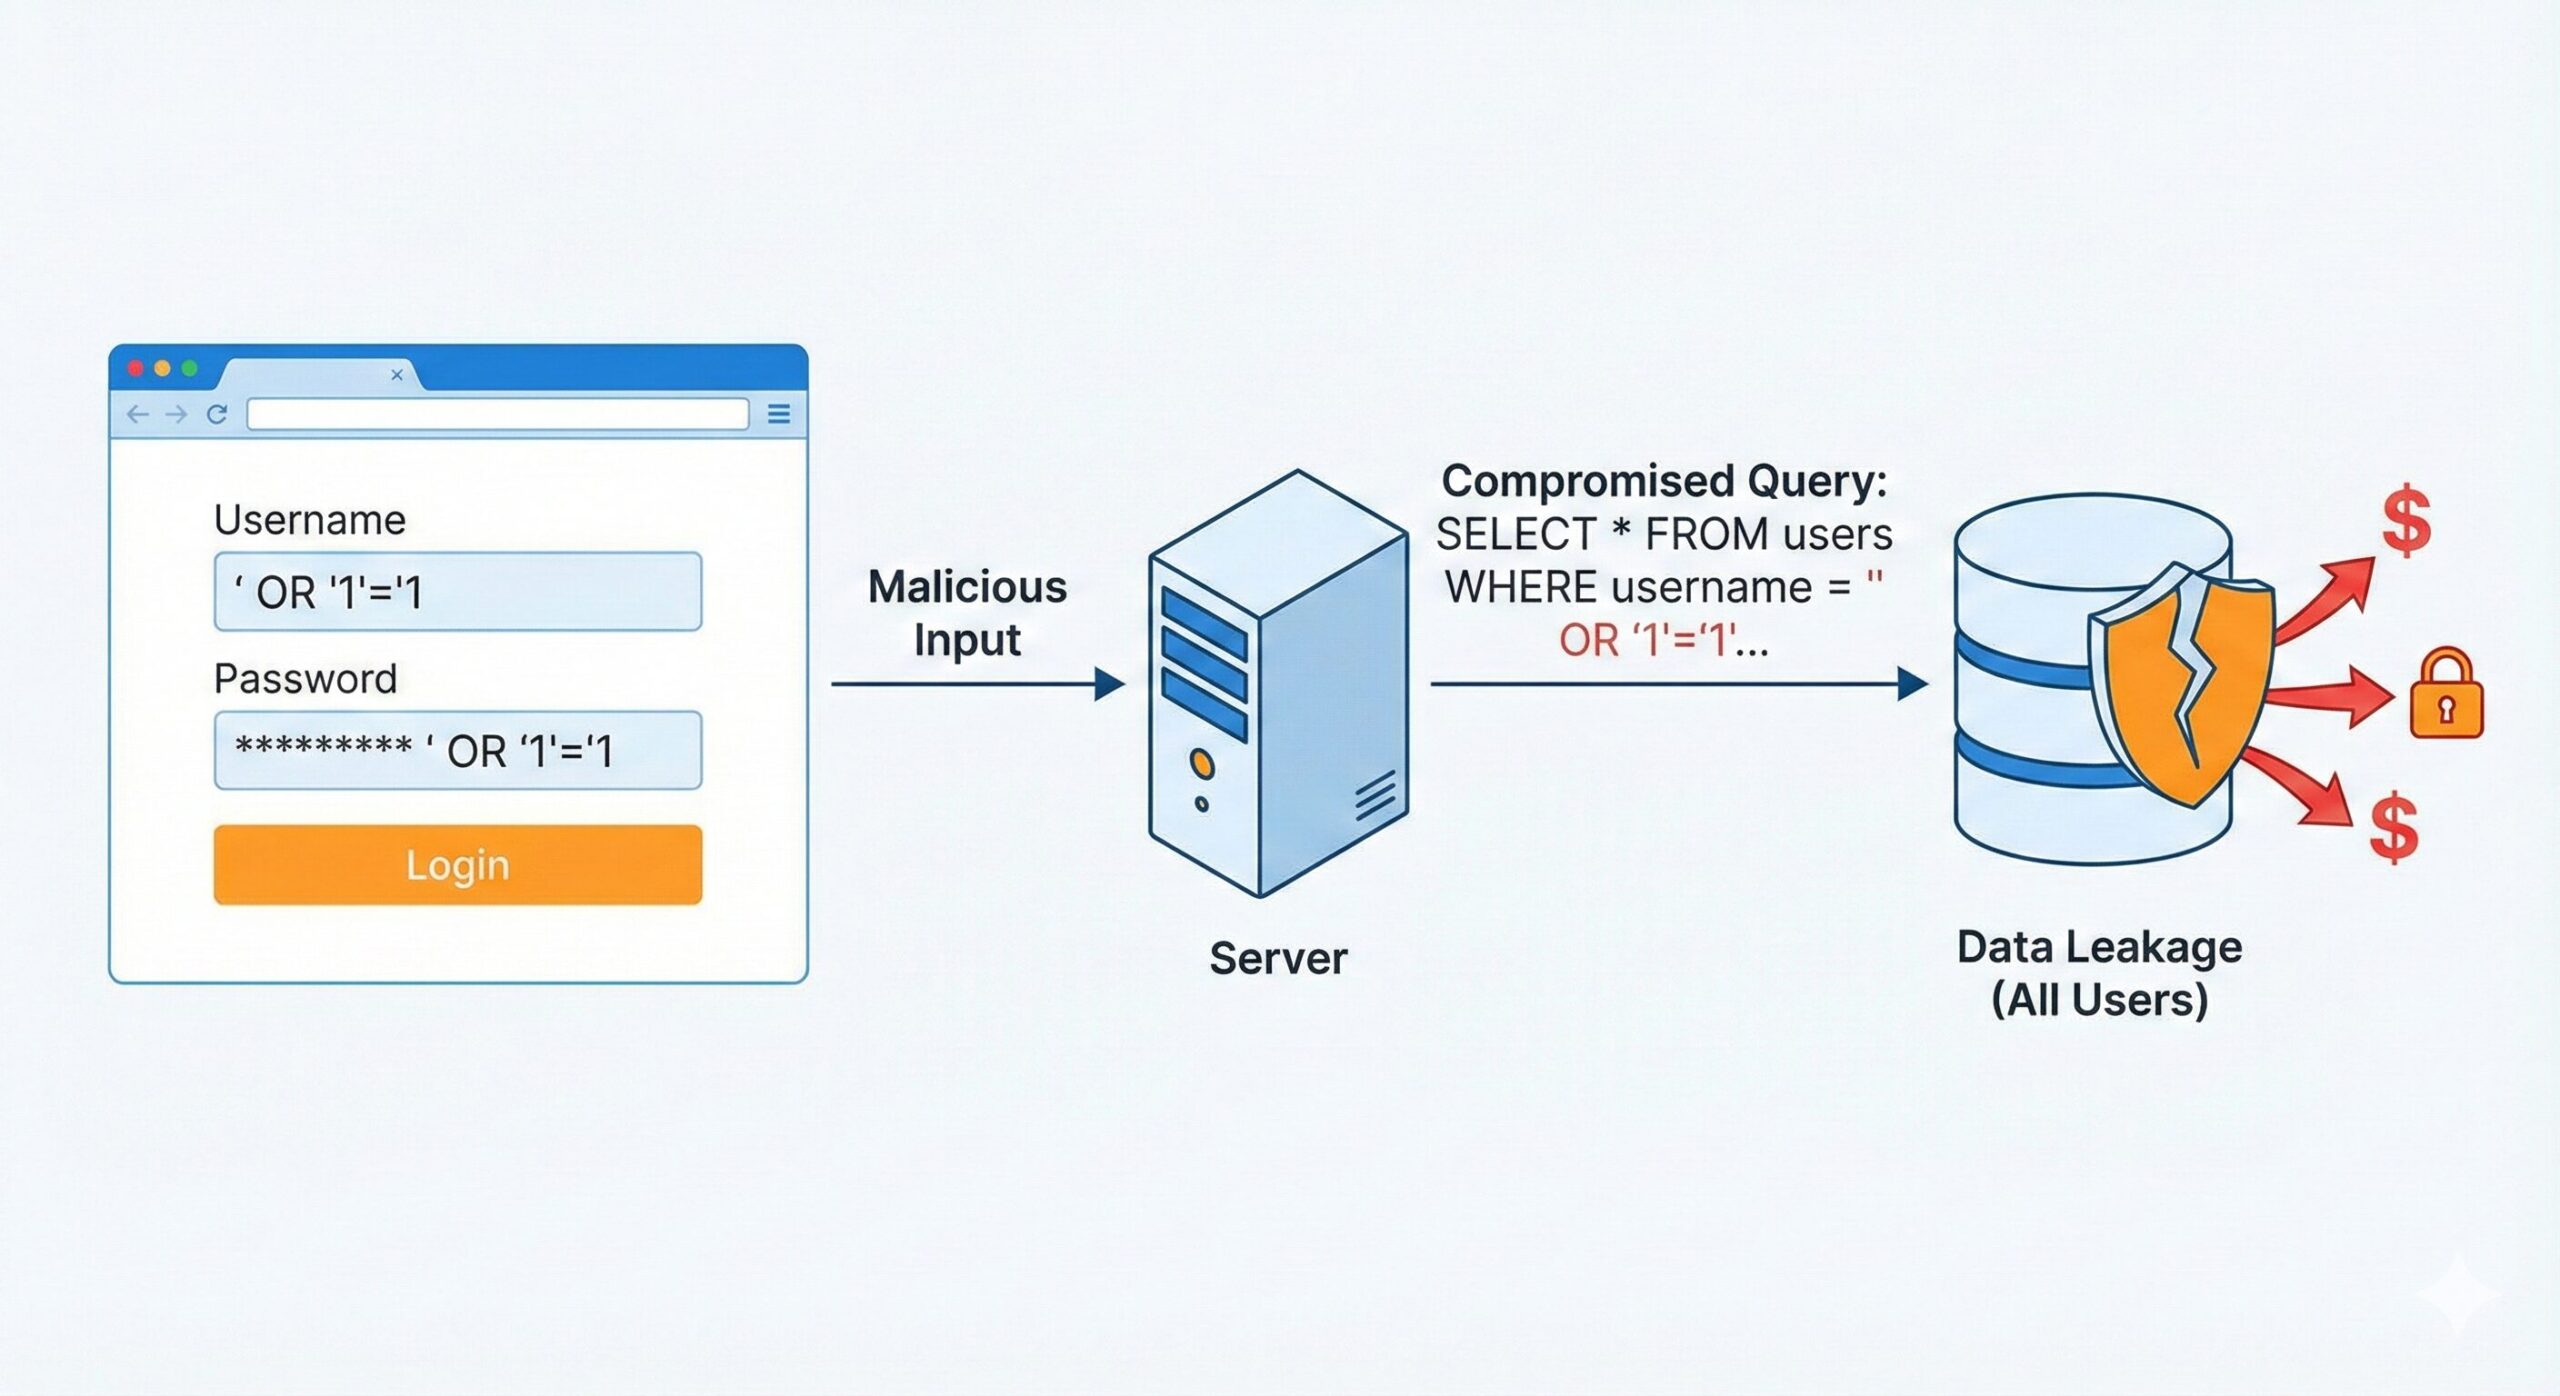
  • Validate all parameters to avoid unwanted data injection.
  • Use API routes to protect server-side rendering logic.
  • Do not expose confidential structures from real projects.
  • Always review generated code before deployment.

4. Additional Considerations

  • Using ActiveReportsJS together with i18next / other i18n libraries:
    If your Next.js project already uses i18next (or similar JavaScript localization / translation libraries), be aware that there can be potential conflicts — especially if your report templates or the rendering logic depend on global locale settings, overridden prototypes, or modifications to built‑in objects.
    To avoid unexpected behavior (e.g. locale/format overrides, translation JSON interfering with report JSON, or i18next initialization affecting global state), you should isolate the report‑rendering context from the rest of your app. For example: load and render the JSON template without i18next’s context, or ensure i18next is not active / initialized when generating PDF on the server.
  • Licensing: Free for development / evaluation — but production requires a valid license key:
    ActiveReportsJS provides a “trial / evaluation mode” which allows you to develop locally without a license key. However, in this mode, exported reports will contain a watermark and the standalone designer has a limited evaluation period. For more details, see the official licensing documentation.
    When you deploy to staging or production (or distribute your application), you need to purchase the appropriate ActiveReportsJS license (e.g., a distribution / deployment license), generate a distribution key, and configure your application to set that license key (typically via Core.setLicenseKey(...) or similar). This will remove the watermark and ensure compliance with licensing terms.

5. Conclusion

Using ActiveReportsJS with Next.js provides a clean and scalable way to generate PDF files from JSON templates. By combining parameters, dynamic data, and predefined layouts, developers can create powerful report systems without building UI elements manually.

If you are exploring modern reporting solutions and want to apply them in real-world applications, our company encourages continuous learning and high-quality engineering. For more information about our technology expertise or to discuss potential collaboration, please reach out through our official contact channels.


Whether you need scalable software solutions, expert IT outsourcing, or a long-term development partner, ISB Vietnam is here to deliver. Let’s build something great together—reach out to us today. Or click here to explore more ISB Vietnam's case studies.


Reference Documentation

View More
1 3 4 5 6 7 25
Let's explore a Partnership Opportunity

CONTACT US


At ISB Vietnam, we are always open to exploring new partnership opportunities.

If you're seeking a reliable, long-term partner who values collaboration and shared growth, we'd be happy to connect and discuss how we can work together.

Add the attachment *Up to 10MB