As infrastructure scales, DevOps engineers often face the challenge of maintaining multiple container environments. Logging into individual servers via SSH to check container health is inefficient and error-prone. To solve this, you need a robust solution to manage remote Docker with Portainer.
Portainer offers a lightweight, centralized management interface that simplifies container operations. By utilizing a Client-Server architecture (Portainer Server + Portainer Agent), you can control multiple Docker hosts from a single dashboard. This guide covers the installation process on your local management machine and the remote servers you intend to control.
Prerequisites
Before proceeding, ensure you have:
-
Docker Installed: On both your local PC and the remote servers.
-
Network Access: Connectivity between the local PC (Management Node) and the Remote Servers (Target Nodes).
1. Setting Up the Management Node (Local PC)
First, we will establish the "Command Center." This is the machine where you will view the dashboard. In this scenario, we use a Windows PC running Docker Desktop.
1.1 Install Portainer Server
Open your Command Prompt (CMD) or PowerShell and execute the following commands to create a data volume and deploy the server container.
# Create a volume for Portainer data
docker volume create portainer_data

# Run Portainer Server container
docker run -d -p 8000:8000 -p 9443:9443 --name portainer --restart=always -v /var/run/docker.sock:/var/run/docker.sock -v portainer_data:/data portainer/portainer-ce:latest
|
Disclaimer: This code snippet is generated for illustrative purposes. Please perform a technical review before implementation.
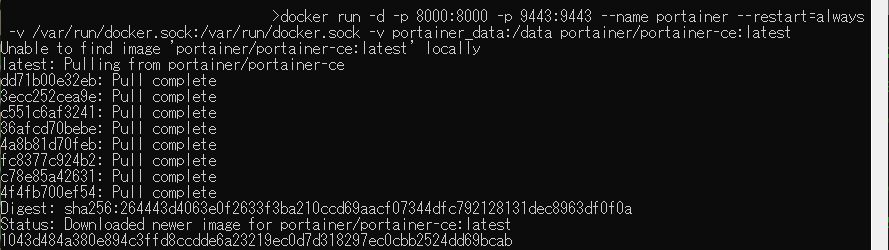
(Fig. 1: Executing the Portainer Server installation command on the Local PC.)
1.2 Verify Local Installation
Once the command executes, verify that the container is running via Docker Desktop. It should be active on ports 8000 and 9443.
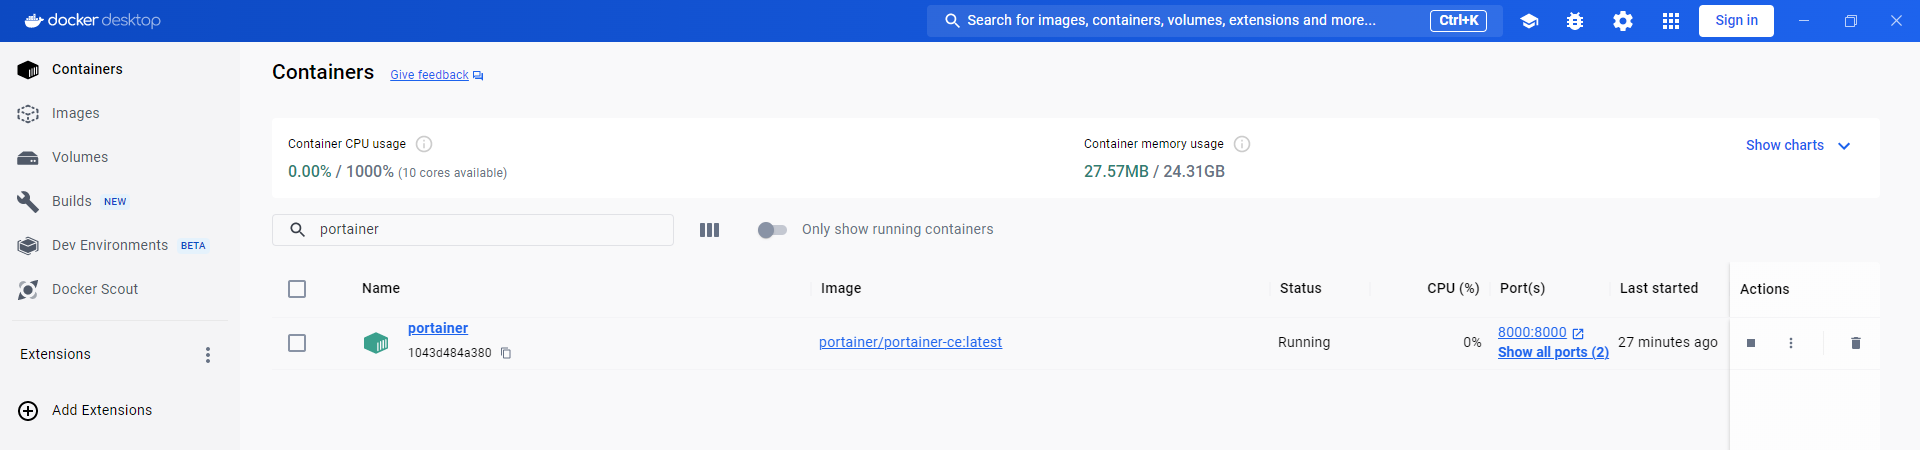
(Fig. 2: Docker Desktop confirming the Portainer Server container is active.)
Access the dashboard by navigating to https://localhost:9443 (or your PC's IP). You will be prompted to set up an admin account (e.g., admin / <secure_password>).
2. Setting Up the Target Node (Remote Server)
Now, we need to prepare the remote server (e.g., your API Server) to accept commands from our management node. To manage remote Docker with Portainer securely, we use the Portainer Agent.
2.1 Deploy the Portainer Agent
Connect to your remote server and run the specific Agent command. This container acts as a satellite, communicating with your main Portainer instance.
docker run -d -p 9001:9001 --name portainer_agent
 --restart=always -v /var/run/docker.sock:/var/run/docker.sock -v /var/lib/docker/volumes:/var/lib/docker/volumes portainer/agent:latest
|
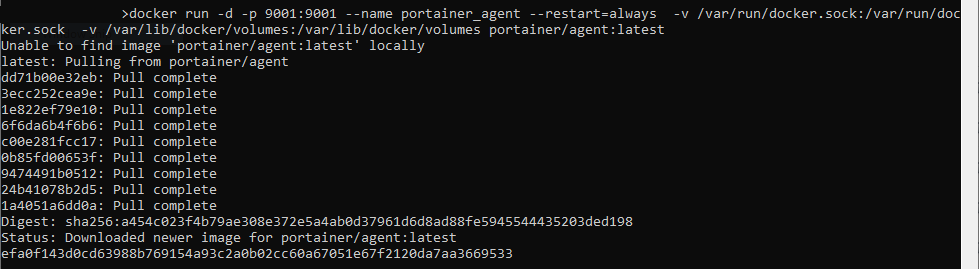
(Fig. 3: Pulling and running the Portainer Agent on the remote server.)
2.2 Verify Agent Status
Ensure the Agent is running successfully. It must be active on port 9001 to communicate with the server.
 (Fig. 4: The Portainer Agent container is running successfully on the Remote Server.)
3. Connecting the Environment
With both components installed, the final step is linking them via the Portainer UI.
-
Access the Dashboard: Go to your Local Portainer instance (
https://<Your_Local_IP>:9443). -
Navigate to Environments: Click on Environments in the left-hand sidebar (sometimes labeled as "Endpoints" in older versions).
-
Add New Environment: Click the + Add environment button.
-
Select Agent: Choose Docker Standalone and then select the Agent option.
-
Configure Connection:
-
Name: Give it a descriptive name (e.g.,
API_Server_1). -
Environment URL: Enter the IP of your remote server followed by the agent port
9001(e.g.,192.168.1.100:9001).
-
-
Finalize: Click Connect.
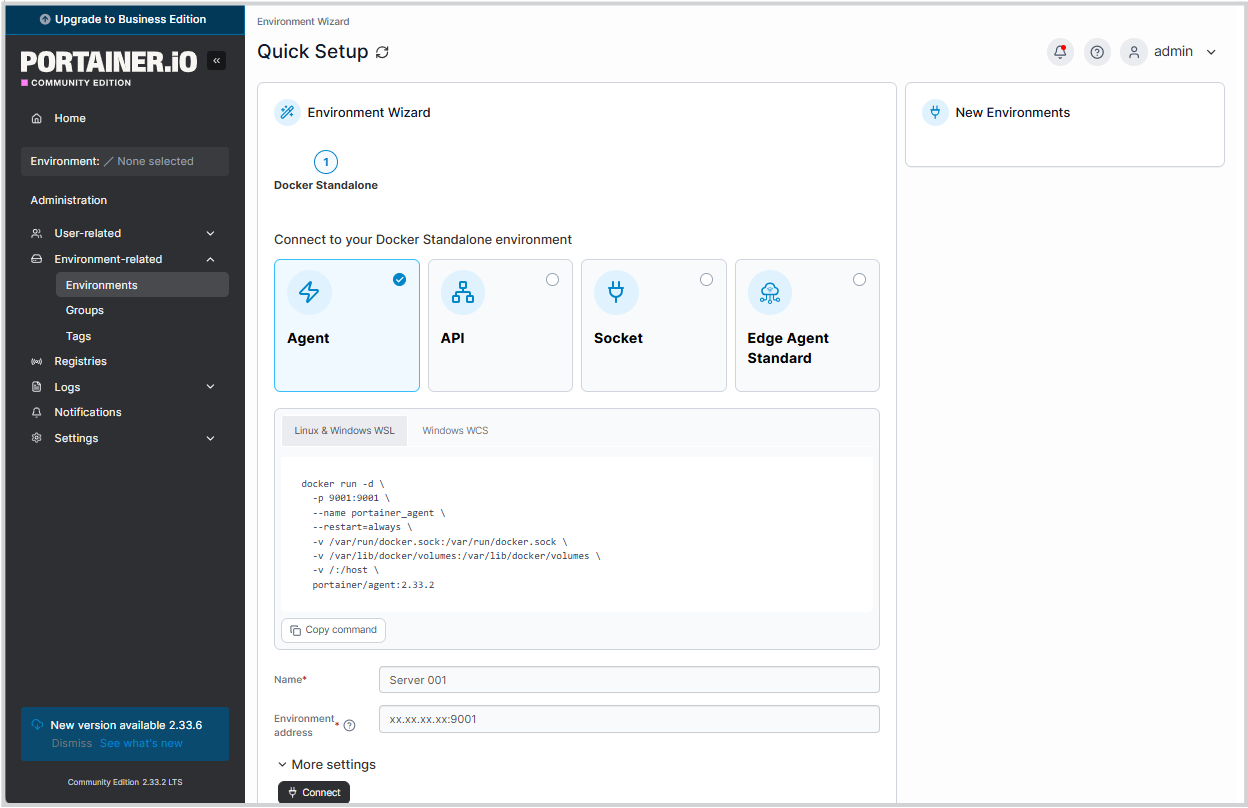
(Fig. 6: Configuring the Agent details to link the remote server)
4. Centralized Management in Action
Once connected, the true power of this architecture becomes apparent. You no longer need to remember IP addresses or SSH credentials for daily tasks.
4.1 The Unified Home Dashboard
The Home screen provides an immediate overview of your entire infrastructure. As seen below, you can monitor the status of both your "local" machine and the remote "Server 001" side-by-side.
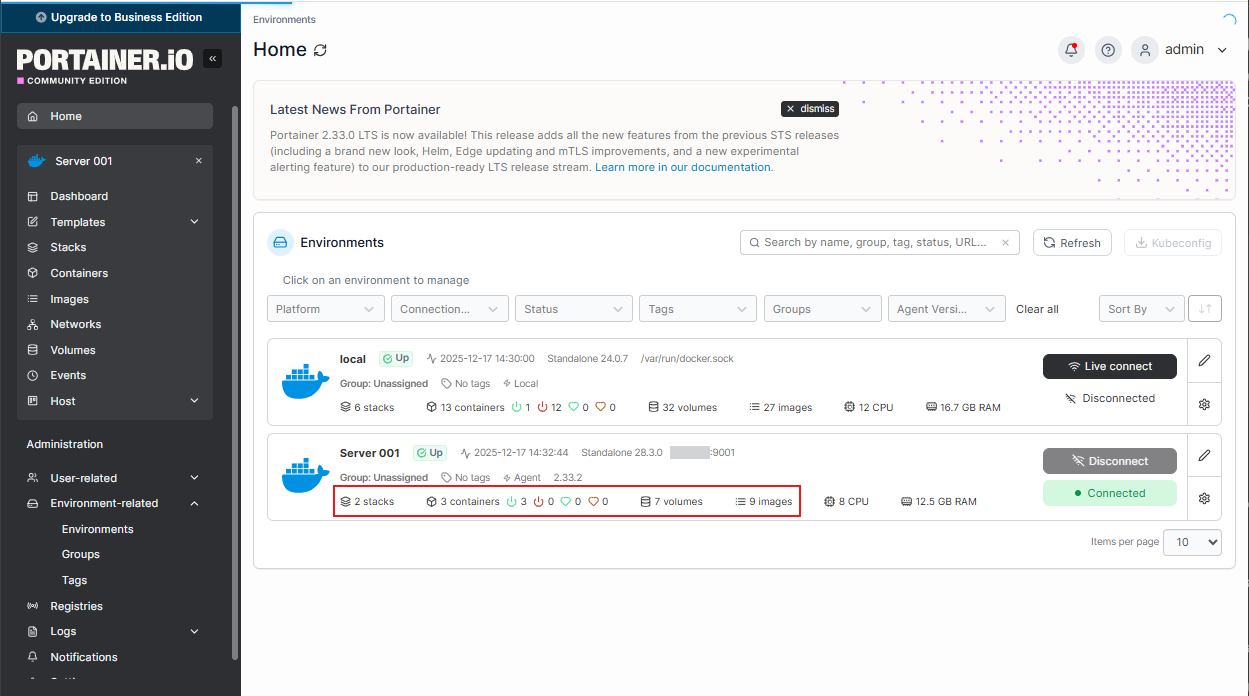
(Fig. 7: The Portainer Home Dashboard showing the connected 'Server 001' with 3 running containers.)
4.2 Granular Remote Control
By clicking on the remote server, you gain full control over its containers. You can start, stop, kill, or restart services directly from the browser. The interface provides access to Logs, Stats, and the Console without ever leaving your management node.
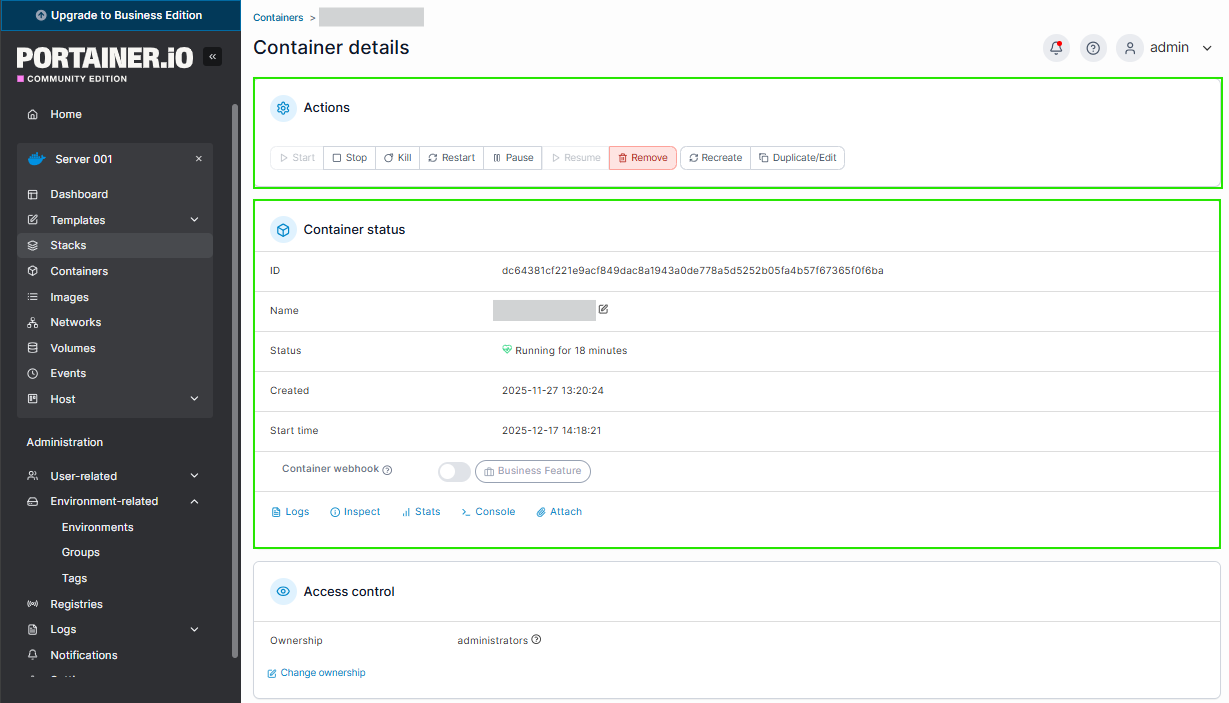
(Fig. 8: Deep diving into a remote container to perform lifecycle management actions.)
Conclusion
By following this architecture, you can manage remote Docker with Portainer seamlessly. You have effectively decoupled the management layer from the execution layer, allowing for a scalable DevOps environment.
Are you looking to optimize your container orchestration further? Contact ISB Vietnam today to discuss how we can help structure your DevOps infrastructure for maximum efficiency. Or click here to explore more ISB Vietnam's case studies.
Source: https://www.portainer.io