Code coverage is a percentage measure of your source is tested. As an example, if you have a small application with only 4 conditional branches of code (branch a, branch b, branch c and branch d), one unit test that verifies conditional branch d will report branch code coverage of 25%.
This article discusses the usage of code coverage for unit testing with Coverlet, a cross platform code coverage library for .NET, with support for line, branch and method coverage.
Create a class library
In Visual Studio, create a class library with ResultService.cs
namespace ClassLibrary1
{
    public class ResultService
    {
        public bool IsPass(int score1, int score2)
        {
            if (score1 < 5)
            {
                return false;
            }

            if (score2 < 8)
            {
                return false;
            }

            return true;
        }
    }
}
Create test projects
In Visual Studio, Add new MSTest Test Project with project name is TestProject1. TestProject1 need to add a project reference of the ClassLibrary1.
Next step, I will create ResultServiceTest.cs in TestProject1 with first TestMethod
using ClassLibrary1;

namespace TestProject1
{
    [TestClass]
    public class ResultServiceTest
    {
        [TestMethod]
        public void IsPass_Score2Failed()
        {
            ResultService result = new ResultService();
            bool isPass = result.IsPass(5, 4);
            Assert.IsFalse(isPass);
        }
    }
}
Analyze code coverage
In Visual Studio, Right click on TestProject > "Analyze code coverage",
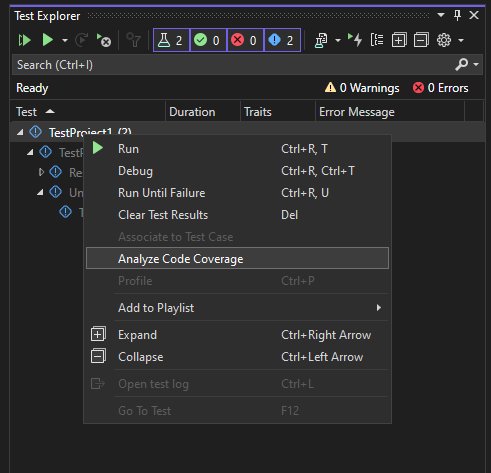
After the process has finished. You can see Code coverage result. Focus your class & method, you can see
- Covered (block)
- Not Covered (block)
- Covered (line)
- Partially Covered (line)
- Not Covered (line)
- ...
Double click on the method IsPass, you can see Covered & Not Covered (line)
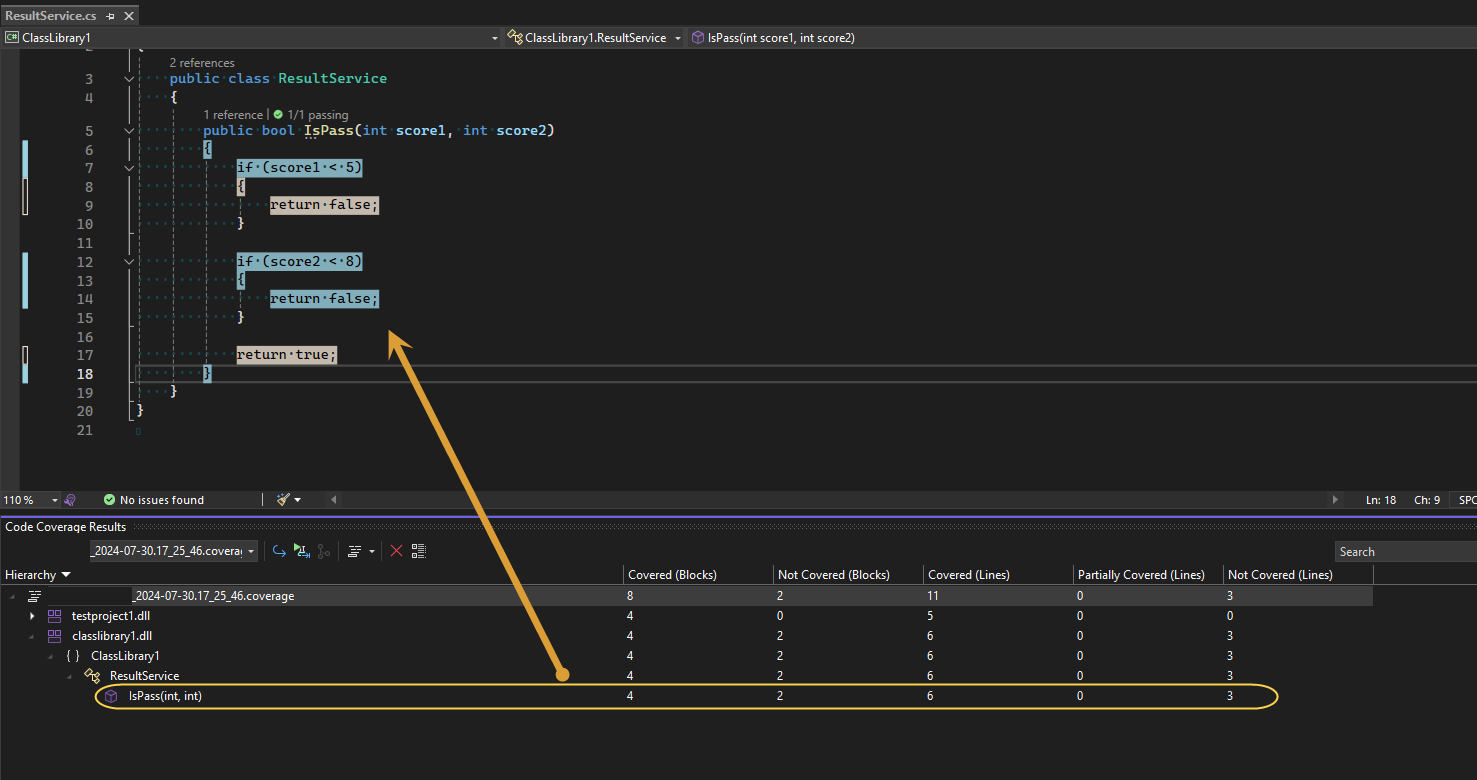
This is a very simple case for you to understand what "Analyze code coverage" can help you in Unit Testing. In actual fact, the number of classes, number of method and Line of code are very complex. "Analyze code coverage" will help you to restrict Not covered (Block of code) when you write Unit Testing code.

