In Cursor AI, Rules are customizable instructions provided to the AI (Agent) model to guide how it handles your requests. Simply put, Rules act as fixed prompts that are always attached to the context whenever the AI executes, helping it remember your principles and preferences consistently. By setting up Rules, you can personalize the AI’s behavior to match your programming style, coding standards, and workflow.
I. Types of Rules in Cursor AI
Cursor AI supports various types of Rules to cover both general and specific scopes. Here are the main types and their characteristics:
| Rule Type | Scope | Where to Configure | Notes |
|---|---|---|---|
| Global (User Rule) | Entire Cursor environment, applies to all projects and requests. | In Cursor Settings > General > Rules for AI (global settings). |
Always attached to every prompt (global rule). |
| Project Rule | Applies only within the scope of a specific project (can be narrowed down by folder or file type). | Rule file in .mdc format inside the .cursor/rules/ folder of the project (created via the “New Cursor Rule” command or manually). |
Included in the context when working within that project. Can be configured to automatically apply to files matching a pattern (globs) or always apply to the entire project depending on the setup. |
| Memories | Temporary context for a chat session (current conversation). | Automatically generated during chat sessions, not manually configured. | Remembers decisions and information agreed upon in the conversation for consistent AI behavior. Exists only in the current chat session, not used in others. |
| Legacy .cursorrules | Project rules (old method, single file). | .cursorrules file in the root directory of the project. |
Deprecated – still works but not recommended. Should migrate to using the .cursor/rules folder with .mdc files for better organization and flexibility. |
(Table: Differences between types of Rules in Cursor AI and their usage)
1. Global/User Rules
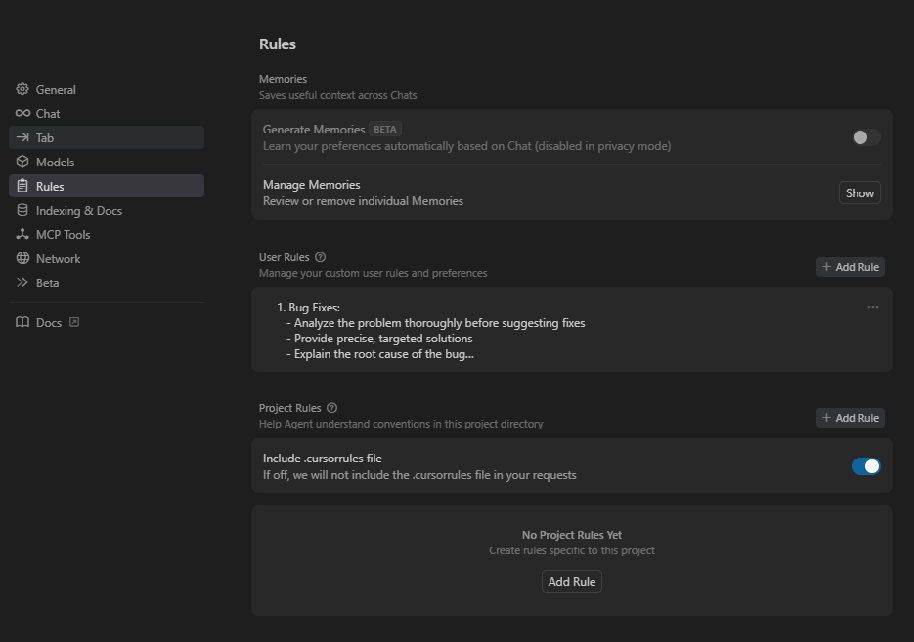
These are global rules that apply to every project. You configure them directly in the Cursor (Settings) section of the app. Specifically, open Cursor Settings, go to General > Rules for AI, then enter the desired instructions in the text box and click "Save" to save them. These instructions will always be respected by the AI for all your prompts, regardless of which project you are working on.
Format: Global Rules are plain text, without the YAML metadata required for project rules. You can write them as a numbered list or bullet points, depending on your preference. Here’s an example of a global rule:
|
This example defines how the AI should handle bug fixes, maintain simple code, and perform code changes. Notably, in the Code Changes section, it instructs “Do not alter unrelated files”, which is the exact guidance you need to ensure the AI only focuses on the request provided, not making unsolicited changes.
2. Project Rules
Project Rules are rules specific to a particular project, stored together with the project's source code (can be included in version control like Git). Each project can have multiple rules, organized in the .cursor/rules/ folder within the project's root directory. You can quickly create a new project rule by opening the Command Palette (Cmd+Shift+P or Ctrl+Shift+P in VSCode) and running the “New Cursor Rule” command. This command will generate a sample file in .cursor/rules for you to fill in. Alternatively, you can manually create a .mdc file (e.g., my-rule.mdc) in .cursor/rules/ and write the rule in MDC format.
Scope: Project Rules are only effective when you are working within that project. They allow you to encode the specific knowledge of the project for the AI to follow, such as architectural guidelines, libraries used, team coding style, etc. Because they are stored within the project, these rules can also be shared with other team members (by pulling the code together) so that the whole team benefits from consistent AI guidance.
Project Rules can be configured with flexible application levels through the metadata (YAML header of the .mdc file):
| Rule Type | Metadata Settings | Description |
|---|---|---|
Always |
alwaysApply: true |
Always applied in every context when working on that project. |
Auto Attached |
globs: ["pattern"], alwaysApply: false |
Automatically applied when you interact with files matching a certain pattern. You configure this by specifying globs (file pattern list) and alwaysApply: false. Whenever a matching file is used by the AI or you open it, the rule will be automatically attached. |
Agent Requested |
description: "...", alwaysApply: false |
Rule is in a state where the AI “decides” whether to use it. You need to provide a |
Manual |
alwaysApply: false (or omitted) |
Rule only applies when you manually call it. Rules without alwaysApply and without globs typically fall into this category (unless they have a description that allows the Agent to use them). You can manually attach a rule by typing |
In short, with Project Rules, you can decide which rules are always on, which ones only activate for certain files, and which ones stay dormant until you need them. This ensures that the scope of each rule is tightly controlled, preventing general rules from unintentionally affecting unrelated areas.
3. Conversation Memories (Memories)
Memories are Cursor’s automatic mechanism: when you chat with the AI, Cursor can generate “temporary rules” based on the content of your conversation. For example, if you and the AI agree on a rule (like “use framework X version Y”), Cursor can create a corresponding memory rule so that in future replies during that session, the AI doesn’t forget it. Memories work like short-term memory: they only exist in the current session. They help reduce the need to repeat information. However, when you start a new chat session or a different project, those old memories will not apply. (Currently, you cannot directly modify memories beyond continuing the conversation).
4. Legacy Rules (.cursorrules)
Previously, Cursor AI used a special file called .cursorrules placed in the project’s root directory to store all the project’s rules. This file served as a set of instructions (similar to global rules but at the project level). Currently, this method has been replaced by Project Rules in the .mdc format within the .cursor/rules/ folder, which is more flexible and organized. Cursor AI version 1.0.0 still supports reading the .cursorrules file for backward compatibility, but it’s recommended to migrate the content to the new rule format (which can be broken down by topic, applied to globs, etc.). If you are upgrading from an older version and have a .cursorrules file, enable the “Include .cursorrules” option in the Settings to activate it, or better yet, move the content to the new format.
II. Setting Up Global Rules
As mentioned, to set up Global Rules, go to the Settings of Cursor and select General > Rules for AI. Here you’ll find a text box for entering instructions. Each line or group of lines here acts as a system-level guideline for the AI.
How to write: You can write these guidelines as a list (using - or numbering). Keep each point short and clear (avoid long paragraphs). Use direct command-style sentences to specify behavior for the AI, such as: “Always do X…”, “Never do Y…”, “Prioritize Z…”. This helps the AI understand exactly what to do.
Some useful tips for global rules to achieve your goals:
-
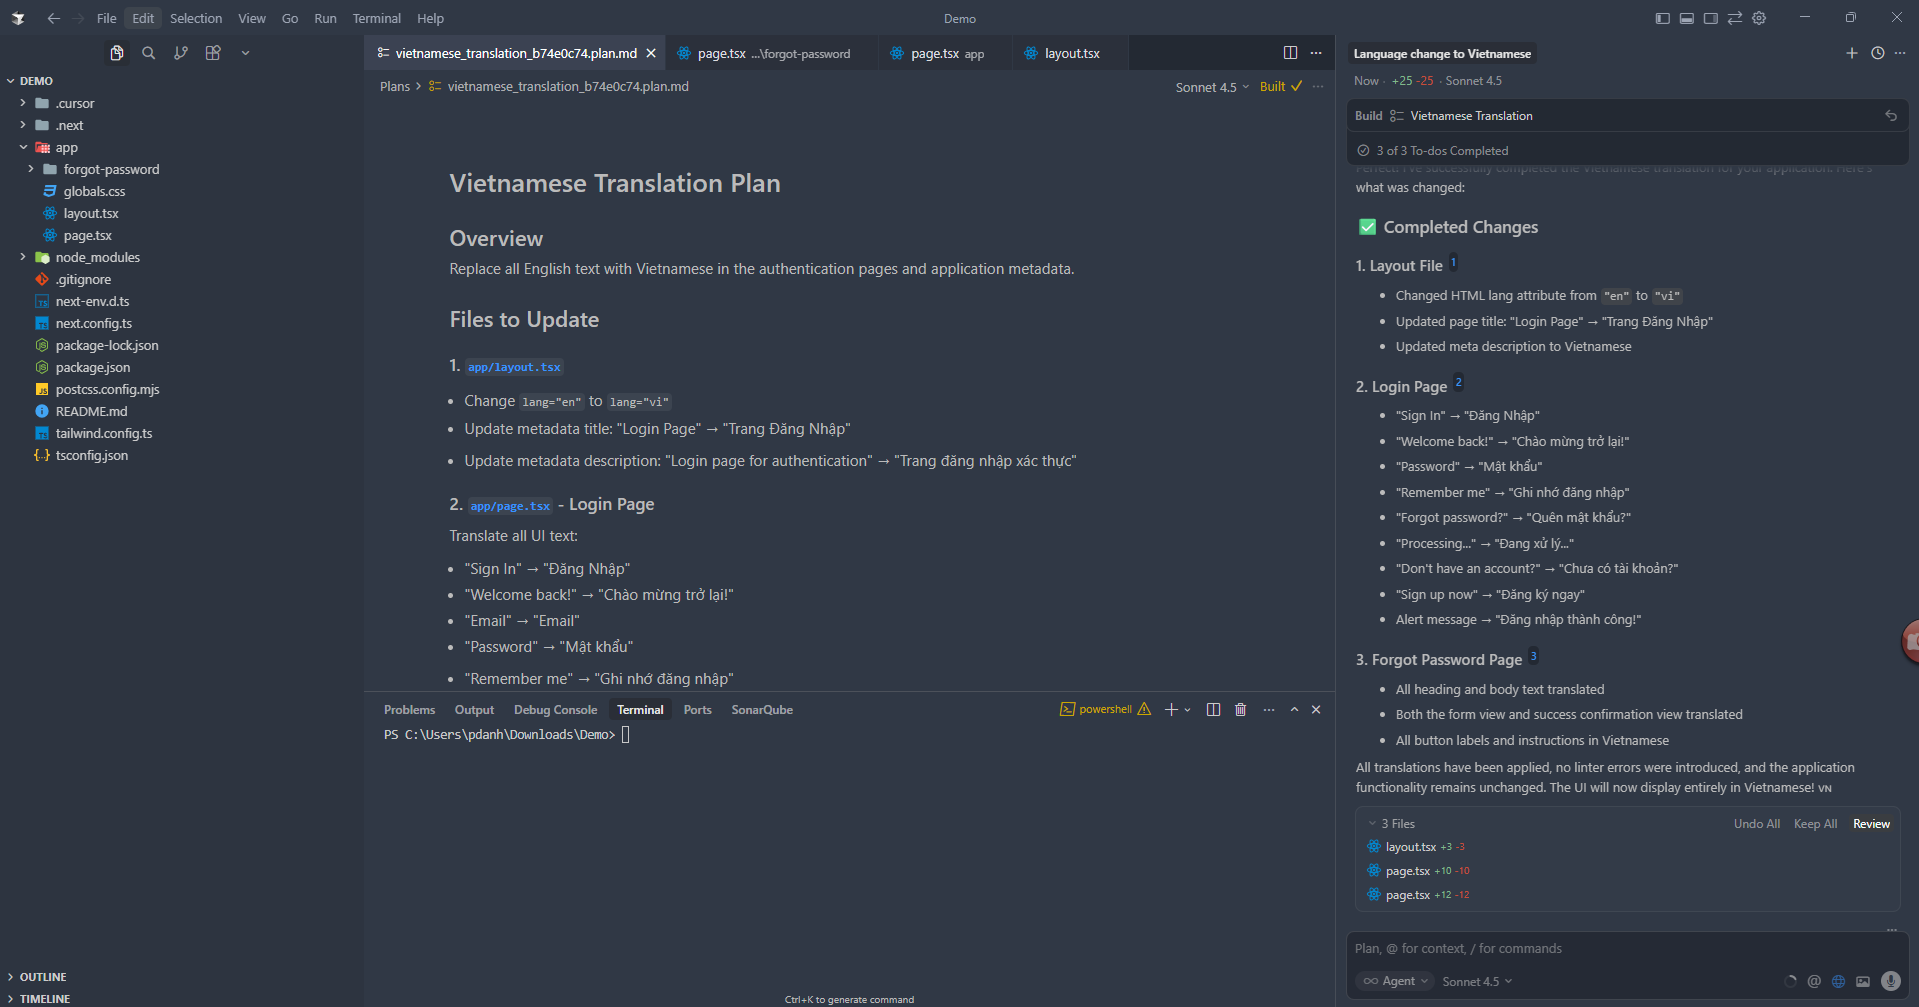
Focus on the exact request: As shown, include a line stating that the AI should only do exactly what’s asked in the prompt. For example: “Only focus on fulfilling the stated request, do not change other code unless specifically instructed.” This rule prevents the AI from automatically fixing or reformatting unrelated parts of the code. (The Cursor example also highlights this: "Do not alter unrelated files" – do not touch unrelated files).
-
Report errors, don’t auto-fix: To meet error-handling needs, add a guideline like: “If you find critical errors or bugs outside the requested scope, let me know in the result, but don’t fix them unless I ask.” This way, the AI helps you identify potential problems but respects your choice to fix them or not.
-
Language and response style: If you want the AI to always respond in Vietnamese (or another language), state clearly: “Always respond in Vietnamese unless requested otherwise.” You can also set rules about tone, like: “Reply concisely, avoid rambling” or “Explain briefly before giving the code,” as you prefer.
-
General coding principles: You can include general coding principles you always want to follow. For example: “Follow the KISS principle (Keep It Simple, Stupid) – prefer simple solutions, avoid unnecessary complexity.”, “Apply DRY – don’t repeat code.”, “Always include error handling for IO operations.” These ensure the AI maintains overall code quality in every situation.
After entering your desired rules, click Save to store them. From then on, whenever you use the AI (either in Chat or inline edits), these rules will automatically be included in the model’s system prompt. You can check this by observing the responses: the AI will comply with the limits/guidelines you set. For example, if you’ve forbidden the AI from editing unrelated parts, it will only point out errors (if any) as comments rather than quietly changing the code.
III. Setting Up Project Rules
To create a rule for a specific project, first ensure that the project is open in Cursor (or in VSCode with the Cursor AI extension). Here’s how to do it:
-
Create a new rule file: Use the “New Cursor Rule” command (open the Command Palette and type this command). Cursor will automatically create a new
.mdcfile in the project’s.cursor/rules/folder. You may be prompted to name the rule – choose a short, meaningful name that reflects the purpose of the rule, as this filename is also how you’ll manually call the rule later. For example:python-style.mdc,test-guidelines.mdc,auth_api.mdc, etc.
☀ Tip: You can also manually create the folder and file if you prefer. The
.cursorfolder sits alongside yoursrcand other project directories. If it doesn’t exist yet, create.cursor, then arulesfolder inside, and then create the.mdcfile. Make sure filenames are one word (no spaces), and use dashes or underscores if needed.
-
Write the rule’s content (.mdc): Open the newly created
.mdcfile and add your content following the specific structure (see the next section on MDC format). You’ll need to define which files this rule applies to (by settingglobs), whether it’s always applied (alwaysApply), and write the detailed instructions below. -
Save the rule file: After writing it, save the file. Cursor will automatically recognize the new rule. You can check it in Cursor Settings > Project Rules (there’s a UI listing all project rules, possibly with on/off toggles). Make sure your rule is enabled (by default, rules are enabled unless you manually disable them).
-
Verify effectiveness: Open a code file in the project that the rule targets (if the rule uses globs). Try using the AI (e.g., ask something in chat or use completion features) to see if it follows the rule. If the rule is auto-attached, when you open a matching file, Cursor will automatically attach the rule. You might see a notification or icon indicating the rule is active. If it’s a manual rule, try calling it using
@rule_namein the chat to see if it gets applied.
Managing and organizing Project Rules: You can create many rules for a single project, so organizing them sensibly will help with maintenance. Cursor allows you to nest rules in subdirectories inside .cursor/rules. You can create subfolders corresponding to project modules and place related rules there.
For example, your structure might look like this:
project/
 ├─ src/
 ├─ backend/
 │   └─ server/
 │       └─ .cursor/rules/    # rules specific to the backend server
 ├─ frontend/
 │   └─ .cursor/rules/        # rules specific to the frontend
 └─ .cursor/rules/            # rules common to the entire project
|
With this structure, Nested Rules (rules inside subdirectories) will automatically apply when you work on files within the same directory. For example, a rule in frontend/.cursor/rules/ will auto-attach when you open files in the frontend. This is very useful for large projects (monorepos) with multiple separate parts – each part can have its own “specialized” rules. Nested rules still appear in the project rules list and can be manually called if needed, but their main advantage is that they only affect the right context, avoiding cross-impact between unrelated parts.
Sharing rules across projects: Currently, Cursor does not officially support sharing common rules across multiple projects (e.g., a coding convention rule that applies to all projects). If you want to reuse a rule, you can copy that .mdc file to another project, or create a repository to store common rules and symlink them into each project. In the future, Cursor might support shared team/project-wide rule management.
IV. Rule File Format and Structure (.mdc)
A rule file uses the MDC (Markdown with Context) format – essentially a Markdown file with a YAML Front Matter block at the top for metadata. A .mdc file has the following structure:
# YAML metadata section
description: "A brief description of this rule’s purpose"
globs:
  - "**/*.py"
  - "src/config/**/*.json"
alwaysApply: false
---
# The rule content section (written in Markdown, using bullet points, etc.)
- This is the first instruction for the AI...
- This is the second instruction...
|
Explanation of the components:
-
The YAML section is placed between the pair of
---at the top of the file. Inside, you can define:-
description: A concise description of the rule’s purpose.
-
globs: A list of file patterns (e.g.,
**/*.pyorsrc/**/*.js) that determine when the rule should auto-attach. If a file open or operation involves a file matching one of these patterns, the rule will be attached by Cursor. -
alwaysApply: A boolean (true/false). If true, the rule always applies in the project regardless of file context (essentially making it a project-wide rule). If false, it depends on file context or manual invocation.
-
other metadata…: You can add other fields to describe the rule (these won’t affect its application but can be used for clarity or future features).
-
-
The rule content section is where you list the instructions. Write them as bullet points or numbered lists. Each point should be clear and instructive, telling the AI what to do or avoid. This is the actual “rule” that the AI will follow. For example, a rule content might include: “Always add comments to exported functions”, “Never use deprecated API X, use Y instead”, etc.
-
Example of metadata + content:
Suppose we want to create a rule that ensures consistent error handling across all files. We might set:
description: "Error handling guidelines"
globs: ["**/*.js"]
alwaysApply: false
---
- Always check for null or undefined inputs at the start of functions and handle appropriately.
- Use try/catch around asynchronous operations or any code that can throw exceptions; log or handle errors in catch.
- Never expose raw error messages to end-users; provide user-friendly messages or codes.
This rule, if saved as e.g.
error-handling.mdc, would automatically attach to any JS file you open or work with, and it ensures the AI consistently applies your error-handling practices.
V. Customizing Rules by Programming Language
You can create specialized rules for each programming language you use (Python, JavaScript, TypeScript, etc.). The purpose is to have the AI understand and follow the specific styles and best practices for each language. The approach is to create separate rule files, each targeting files based on their extensions.
For example, if you want a rule to apply to all Python code in the project, use the glob pattern **/*.py. Similarly, for JavaScript/TypeScript, you might use **/*.{js,jsx,ts,tsx} to cover both JS and TS. Each rule contains instructions tailored to that language, such as coding guidelines, code style, preferred libraries, etc.
Below are two illustrative examples of how to set up language-specific rules:
Example: Rule for Python
Suppose you want the AI to always follow Python standards when writing Python code. You can create a file named python-style.mdc (or any name you prefer) with the following content:
description: "Python coding conventions (PEP8 and best practices)"
globs:
  - "**/*.py"
alwaysApply: false   # The rule will automatically apply when a .py file is handled
---
- Write Python code according to **PEP8** standards: use snake_case for variable and function names, CamelCase for class names; limit lines to 79 characters; indent with 4 spaces.
- Prefer using f-strings (f"...") instead of concatenation or `%` formatting (per PEP498, clearer code).
- Add **type hints** for functions and variables whenever possible to improve code clarity and error checking.
- Write docstrings for important functions/classes (follow PEP257) to explain their purpose and usage.
- Follow Pythonic idioms: for example, prefer list comprehensions over basic loops for list processing; avoid using global variables if not necessary; use context managers (`with`) when working with files or resources that require opening/closing.
|
VI. Customizing Rules for Specific File Types
Beyond language-specific rules, you can write rules based on file types or file functions. Two common examples in your context are: test files (e.g., files ending with .test.ts) and configuration files (e.g., *.config.json). Each file type plays a unique role in the project, so writing code for them has its own standards. Creating rules for each file type helps the AI recognize the context and provide more appropriate results.
Example: Rule for Test Files (.test.ts)
Suppose you want to standardize how the AI writes unit tests for your project (using TypeScript with the Jest framework, for instance). You could create a rule with globs: ["**/*.test.ts", "**/*.spec.ts"] to apply to all test files. The rule content might look like this:
description: "Test writing guidelines (Jest + TypeScript)"
globs:
  - "**/*{.test,.spec}.ts"
alwaysApply: false
---
- Follow the **Arrange-Act-Assert** pattern when writing tests: clearly separate data setup, action execution, and result assertions.
- Use Jest’s `describe` and `it`/`test` functions to organize test cases by module/function. Each `it` should have a descriptive name following the format **"should [expected outcome] when [condition]"**.
- Use `jest.mock()` to mock external dependencies when needed, ensuring test isolation.
- Cover both **positive** (valid input) and **negative** (error input) scenarios for each tested function.
- Avoid complex logic within tests: each test case should focus on a single scenario. If logic is repeated, consider using `beforeEach`/`afterEach` for setup/teardown.
|
With this rule, the AI will follow best practices for writing tests:
- Use the Arrange-Act-Assert model to keep tests clear.
- Provide meaningful test names and leverage the full features of the framework (describe/it).
- Ensure comprehensive testing (covering both good and bad cases) for reliability.
- Keep each test focused and simple, avoiding overloaded test cases.
As a result, when you ask the AI to write a test (for example, “write a test for function X”), the generated code will align more closely with your team’s standards, requiring minimal manual cleanup.
VII. Customizing Rules for Each Project
Each project usually has its own unique aspects: which framework it uses, its architecture, naming conventions, directory structures, etc. Project-specific Rules let you encode this unique knowledge for the AI, making it a “project-savvy assistant” rather than just a generic tool.
When customizing rules for a specific project, first identify the unique guidelines and instructions you want the AI to always know. These might include:
- Architecture & Design: For example, in a microservice project, you might have a rule “Always create new services following template X, including layers A, B, C”; in another project, a rule “Use MVVM architecture for client apps.”
- Libraries & Frameworks: E.g., “Always use Axios for HTTP requests” or “Use Lodash for complex array manipulations.” This way, the AI will stick to your chosen tools.
- Coding style: Specify any style guides that are project-specific (if not already covered globally). For instance, “In this project, always use functional components (React)” or “Use repository pattern for data access.”
- File/Folder structure: If your project has a unique organization, add a rule like “When creating new files for feature X, place them under folder Y.”
Once you have these points, create a project rule (as above) and include them. For example, a project rule might be called project-guidelines.mdc and include instructions covering the above aspects (specific to that project).
Also, consider naming conventions specific to the project: if the project uses a certain prefix for test files, or a special suffix for interfaces, etc., include that in the rules. The goal is to capture all “tribal knowledge” of the project so the AI is not left guessing.
VIII. Customizing Rules According to Coding Conventions (e.g., PEP8, Airbnb)
Coding conventions are standards about code (often regarding style and formatting) set by communities or companies. Examples include PEP8 for Python, Google’s Java style guide, or the Airbnb style guide for JavaScript/React. If your team follows a specific convention strictly, it’s a good idea to encode this in your rules.
For instance, you could have a rule: “All code must follow Airbnb JavaScript style guide”. However, it’s more useful to break this down into concrete points (since the AI might not inherently know all of Airbnb’s style rules by name). It might be better to specify some key ones explicitly, like: “Use single quotes for strings, no semicolons (per Airbnb style)”, “Use functional components and Hooks for React, avoid class components”, etc.
If you have a company-internal style guide, you can also distill that into rules. For example, if your company has a specific way to structure commit messages or code comments, include a rule for that (even if it’s not code, you can instruct the AI to apply those standards in relevant contexts, like when generating commit text or documentation).
In short, by adding rules for coding conventions, you ensure the AI’s output is not just functionally correct but also stylistically aligned with your expectations.
IX. Notes on Optimizing Rules
Setting up powerful Rules can greatly enhance the AI’s performance and accuracy when coding, but you should also consider a few points to optimize their use:
-
Rule Specificity: Make sure each rule has a clear focus. If a rule tries to cover too much (for example, a rule that includes coding style, error handling, and project architecture all in one), it might dilute its effectiveness. It’s often better to create multiple focused rules than one catch-all rule.
-
Rule Length: Keep rules concise. The AI will read these rules every time it runs; extremely long rules might use up context space and possibly be ignored if too verbose. Use short, imperative sentences and break complex guidelines into bullet points.
-
Ordering: When multiple rules apply, the AI will consider them all. If there are conflicting instructions, the outcome might be unpredictable. Try to avoid conflicts, but if some guidelines are more important, note that (e.g., prefix a critical rule with “Important:”).
-
Review and Update: Regularly review your rules. As your projects evolve, some rules might become obsolete or new situations might need new rules. Maintaining your rule set is key to keeping the AI relevant.
-
Context Awareness: Remember that rules provide guidance, but the AI also sees the immediate code/text context. If a rule says “use library X”, but the project doesn’t have X installed, the AI might mention that. Ensure your rules align with reality (e.g., don’t enforce a library that isn’t being used).
Finally, once you’ve set up and optimized your Rules, you’ll find your coding experience with Cursor much smoother. The AI will act “by the book”: only doing what’s asked, warning you when needed, and producing code that follows your project’s standards and style. This not only speeds up your workflow but also reduces the need to fix or reformat AI-generated code, truly making Cursor AI the capable assistant you want. Good luck configuring and using Cursor AI effectively!
Whether you need scalable software solutions, expert IT outsourcing, or a long-term development partner, ISB Vietnam is here to deliver. Let’s build something great together—reach out to us today. Or click here to explore more ISB Vietnam's case studies.
※ References:
(1) Cursor AI - Rules. https://docs.cursor.com/context/rules
(2) Cursor Rules: Customizing AI Behavior for Personalized Coding. https://cursor101.com/article/cursor-rules-customizing-ai-behavior
(3) Awesome CursorRules. https://github.com/PatrickJS/awesome-cursorrules
(4) Use These Cursorrules for Cursor AI... https://huggingface.co/blog/lynn-mikami/cursor-rules#:~:text=3.%20Pattern,files%20matching%20naming%20conventions