
From AR to XR: A Developer-Friendly Tour
Extended Reality (XR) has quietly gone from science fiction to “just another platform” we target alongside web and mobile. If you’re already building with Qt and curious how your skills fit into AR/VR/XR, this post walks through:
- What AR and XR actually mean (and where they came from)
- How AR and XR differ
- Today’s mainstream XR devices
- Common domains where XR is used
- Where XR is going next
- Programming languages & engines behind XR apps
- A small Qt Quick 3D XR sample, with explanation of each QML type
AR & XR: Definitions and a Short History
What is Augmented Reality (AR)?
Augmented Reality overlays digital content onto the physical world, in real time, and in the correct 3D position. Classic examples are:
- Visual instructions overlaid on machinery
- Filters and effects in mobile apps
- Navigation arrows painted onto streets or dashboards
A commonly used definition describes AR as systems that (1) combine real and virtual content, (2) run in real time, and (3) register virtual objects in 3D with the real world. Wikipedia
Key historical milestones:
- 1968 – Ivan Sutherland’s head-mounted display (often cited as the first AR/VR HMD). G2
- 1990 – Tim Caudell at Boeing coins the term “augmented reality”. G2
- 2000s – HUDs(Head Up Display), industrial AR, early marker-based mobile AR. Wikipedia
- 2010s – ARKit (Apple), ARCore (Google) take AR to mainstream phones.
- 2020s – Mixed reality(MR) headsets with color passthrough blur AR/VR (Meta Quest 3, Apple Vision Pro).
What is Extended Reality (XR)?
Extended Reality (XR) is an umbrella term that covers VR, AR and MR, plus anything in between. More formally, XR refers to technologies that combine or interpolate between purely virtual and purely real environments, often using a “digital twin” of the physical world. Wikipedia
Think of XR as the whole spectrum:
- VR – fully virtual world
- MR – real world plus interactive virtual objects anchored in space
- AR – lightweight overlays, often through phones or glasses
XR lets us talk about all of these together without obsessing over the exact label.
AR vs XR: What’s Actually Different?
Short answer: AR is one point on the XR spectrum.
- Scope
- AR is a specific technique: augmenting reality with digital overlays.
- XR is the category that includes AR, VR, and MR—and sometimes even “beyond human senses” visualizations (e.g., seeing radio waves or air quality as graphics). Wikipedia
- Devices
- AR often runs on phones/tablets (ARKit/ARCore) or see-through glasses.
- XR includes fully immersive headsets (VR), mixed-reality HMDs with passthrough cameras, and more experimental smart glasses.
- Interaction
- AR apps may only track a surface or image target.
- XR apps typically track head pose, hands, controllers, depth, and the room itself, supporting room-scale experiences and precise spatial interaction.
So when you build a Quest 3 or Vision Pro app with both passthrough and fully immersive modes, you’re squarely in XR. When you ship an iOS app that puts a virtual sofa on a real floor via ARKit, that’s “just” AR.
Today’s XR Device Landscape
The hardware scene changes fast, but as of now, several product families dominate:
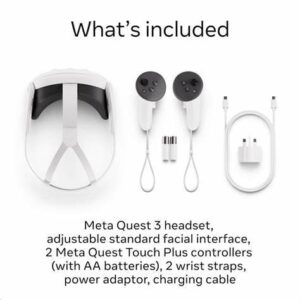
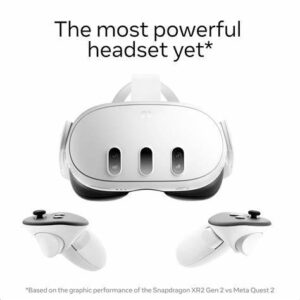
Meta Quest line
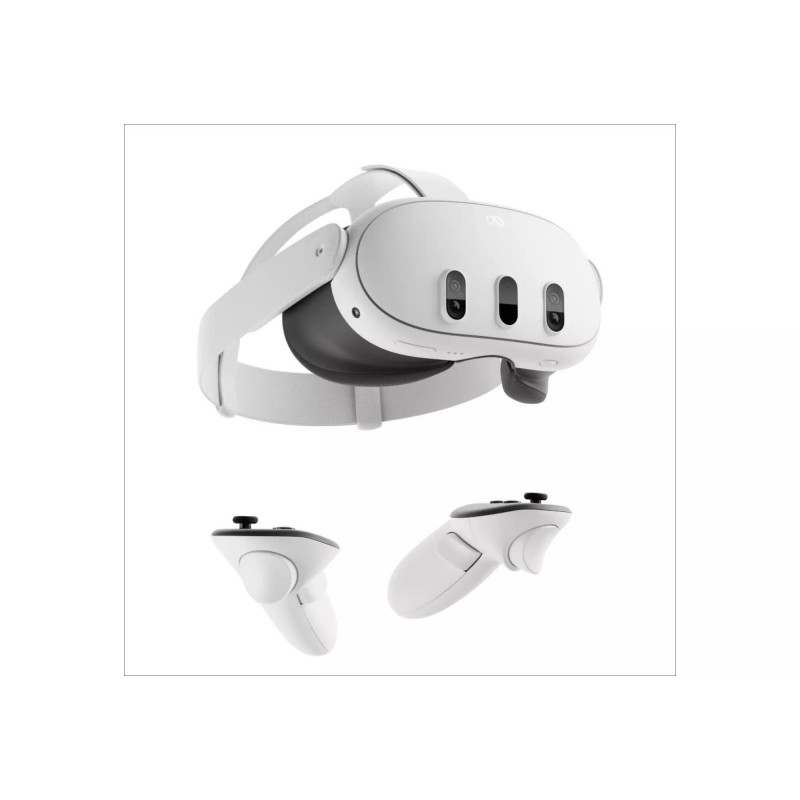
Meta’s Quest devices (Quest 3, Quest 3S, and special bundles like the Xbox Edition) are the most widely used consumer XR headsets, offering standalone VR with color passthrough MR. The Quest 3 is a standalone headset with a Snapdragon XR2 Gen 2, high-resolution displays, and color passthrough to mix virtual objects with the real world. VRcompare+1
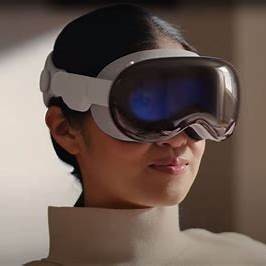
Apple Vision Pro
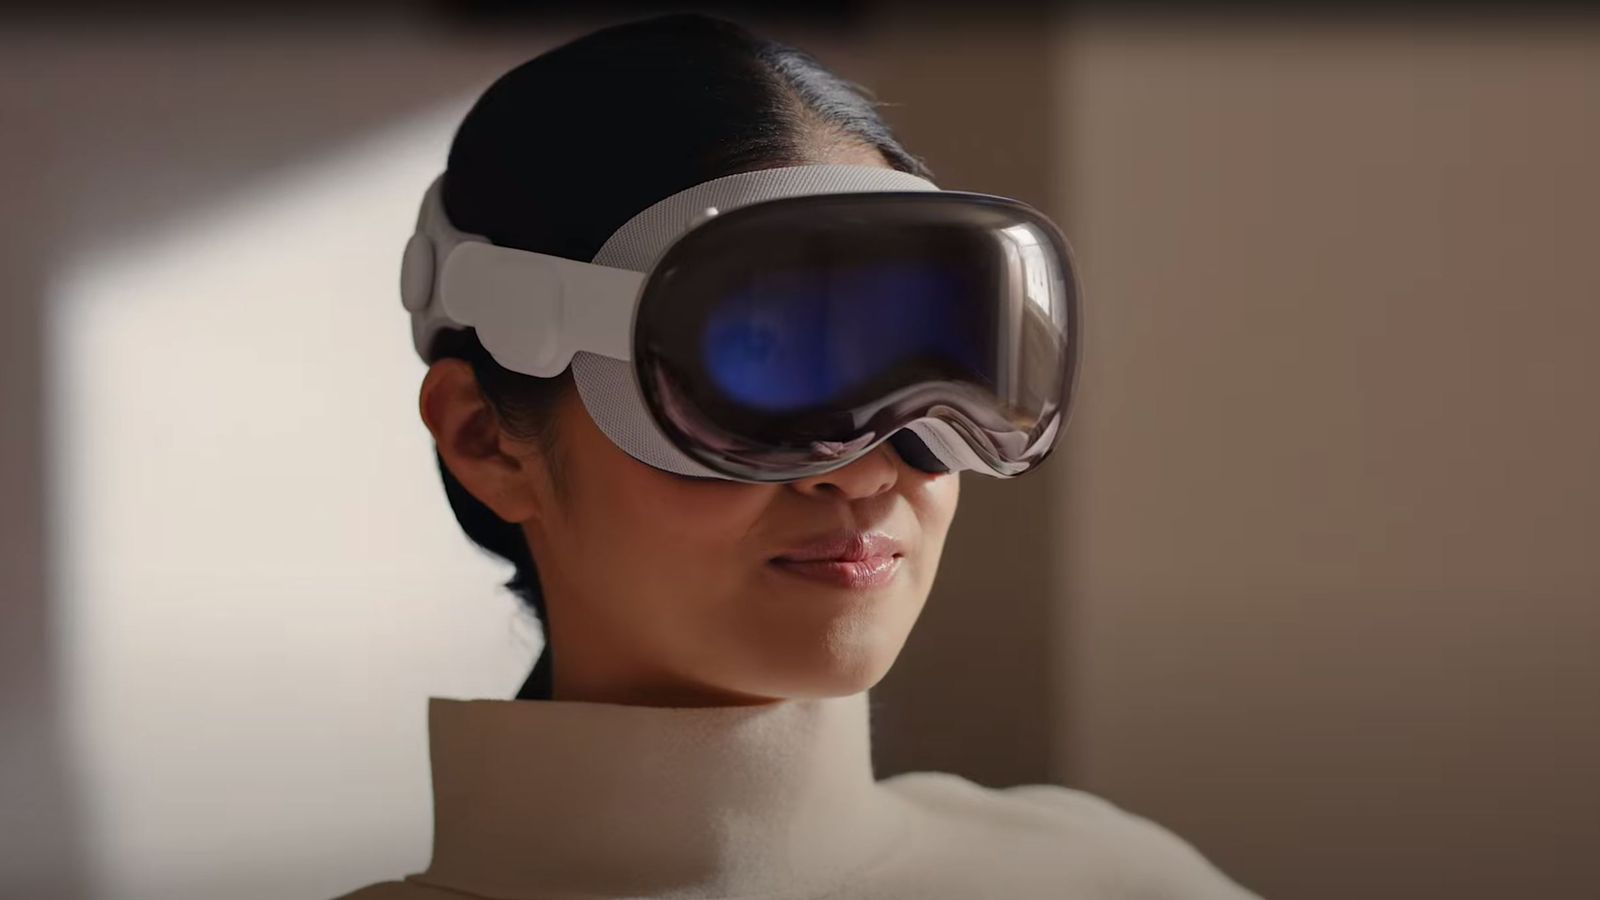
Apple Vision Pro is positioned as a “spatial computer” rather than a VR headset. It uses high-resolution micro-OLED displays, precise eye/hand tracking, and an external “EyeSight” display to show the user’s eyes to people nearby. It runs visionOS, built on iPadOS frameworks, and heavily uses ARKit and spatial UI concepts. Apple+2Wikipedia+2
Samsung Galaxy XR & Android XR Ecosystem
Samsung and Google have introduced the Galaxy XR headset, powered by Android XR and Snapdragon XR2+ Gen 2, targeting both entertainment and enterprise. It supports passthrough AR, PC VR streaming, and AI-enhanced experiences via Google Gemini. WIRED+1
PC VR & Others
- Valve’s long-running Index headset is being sunset in favor of a new device called Steam Frame, with higher resolution and standalone capability. The Verge
- HTC Vive, Pico headsets, and enterprise-focused devices (HoloLens, Varjo) cover specific niches like simulation and industrial training.
Where XR Is Used Today
XR is no longer just for games. Some of the most active domains include:
- Gaming & Entertainment – Immersive games, spatial cinema, location-based experiences, and festivals like Venice Immersive that blend film and XR storytelling. The Guardian+1
- Training & Simulation – Flight simulators, manufacturing procedures, emergency response training. AR is used to overlay procedures on equipment; XR puts trainees in lifelike scenarios. Wikipedia+1
- Healthcare – Surgical planning, medical training, anatomy visualization, rehab exercises, and AR overlays during surgery. Wikipedia
- Architecture, Construction & Real Estate – Walk through buildings before they exist, overlay BIM models on construction sites, or show clients “digital twins” of spaces. Wikipedia+1
- Remote Collaboration & Productivity – Spatial whiteboards, multi-screen virtual desktops (e.g., Windows 11 remote desktop in Quest 3), and 3D data exploration. The Verge+1
If you’re already building remote monitoring, control panels, or dashboards on PC and XR (which you are!), you’re essentially working in this “spatial productivity” space.
The Future of XR Applications
XR’s near-future trajectory looks something like this:
- More Mixed Reality, Less “Blind VR”
Color passthrough and room understanding (depth, spatial mapping) make headsets usable as AR devices at home and at work. Quest 3, Vision Pro, and Galaxy XR are all designed for everyday passthrough use. VRcompare+2Apple+2
- Slimmer Hardware & Smart Glasses
Research devices and early smart-glasses prototypes (including Android XR-powered glasses) hint at lighter, glasses-like form factors for notifications, translation, and contextual help. WIRED+1
- AI-Powered Spatial Experiences
On-device AI (Gemini, Apple’s on-device models, etc.) will turn XR into an always-on assistant that understands your environment: recognizing objects, transcribing conversations, summarizing documents pinned in space, and more. WIRED+1
- Deeper Vertical Integration
Expect more specialized XR apps: surgical guidance, industrial digital twins, spatial cinema, and educational content with strong domain knowledge, not just generic demos. Wikipedia+1
The devices are finally good enough that the bottleneck is shifting from hardware to content and UX—which is where frameworks like Qt, Unity, and Unreal come in.
Programming Languages & Engines for XR
XR apps usually sit on top of an engine or framework. Under the hood, several languages dominate: Index.dev+1
- C#
- Primary language for Unity, historically the most popular engine for VR/AR games and experiences.
- Widely used for Quest, PC VR, mobile AR (via AR Foundation), and many indie XR projects.
- C++
- Core language of Unreal Engine and many in-house engines.
- Used when you need maximum performance or deep engine customization.
- Also the foundation for many XR runtimes (OpenXR implementations, device SDKs).
- Swift / Objective-C
- For iOS, iPadOS, and visionOS apps using ARKit and RealityKit / Reality Composer Pro.
- Swift + SwiftUI / RealityKit is the primary stack for Apple Vision Pro.
- Java / Kotlin
- For Android-level XR / ARCore integrations, especially when you need tight control over camera, sensors, or Android services.
- JavaScript / TypeScript
- For WebXR in browsers and frameworks like three.js, Babylon.js, and A-Frame.
- Great for lightweight experiences or quick prototypes.
- C++/QML (Qt)
- With Qt Quick 3D XR, you can write cross-platform XR apps in QML with C++ backends, reusing your existing Qt skills. felgo.com+1
- Python, Lua, etc.
- Common in tooling, content generation, prototyping, and scripting inside some engines.
Given your current stack, Qt + C++/QML is a natural fit for XR dashboards, remote monitoring tools, and 3D control panels.
A Minimal Qt Quick 3D XR Example
Let’s finish with a simple, self-contained Qt Quick 3D XR scene that you can adapt.
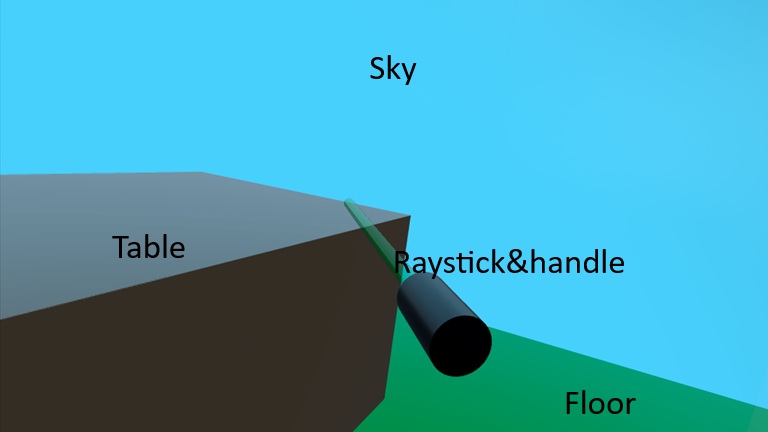
Goal: Show how to:
- Use XrView as the root (instead of Window + View3D)
- Define a floor-based reference space
- Place a cube for a table in front of the user
- Visualize one controller as a cylinder for a ray stick and handle that follows the user’s hand
This follows the structure recommended in Qt’s own XR examples but is simplified for clarity. doc.qt.io+1
main.qml
// main.qml
// Minimal Qt Quick 3D XR scene
import QtQuick
import QtQuick.Controls
import QtQuick3D
import QtQuick3D.Helpers
import QtQuick3D.Xr
XrView {
id: xrView
xrOrigin: theOrigin
environment: SceneEnvironment {
id: sceneEnvironment
lightProbe: Texture {
textureData: ProceduralSkyTextureData {
}
}
antialiasingMode: SceneEnvironment.MSAA
antialiasingQuality: SceneEnvironment.High
backgroundMode: SceneEnvironment.Color
clearColor: "skyblue"
probeHorizon: 0.5
}
DirectionalLight {
eulerRotation.x: -30
eulerRotation.y: -70
}
XrOrigin {
id: theOrigin
z: 100
XrController {
id: rightController
controller: XrController.ControllerRight
poseSpace: XrController.AimPose
Node {
id: rayStick
property real length: 50
z: -length/2
Model {
eulerRotation.x: 90
scale: Qt.vector3d(0.02, rayStick.length/100, 0.02)
source: "#Cylinder"
materials: PrincipledMaterial { baseColor: "green"}
opacity: 0.5
}
}
Node {
id: rayHandle
z: 5
Model {
eulerRotation.x: 90
scale: Qt.vector3d(0.05, 0.10, 0.05)
source: "#Cylinder"
materials: PrincipledMaterial {
baseColor: "black"
roughness: 0.2
}
}
}
}
}
Model {
id: floor
source: "#Rectangle"
eulerRotation.x: -90
scale: Qt.vector3d(5,5,5)
materials: [ PrincipledMaterial {
baseColor: "green"
}
]
}
Model {
id: table
property real height: 70
position: Qt.vector3d(0, height / 2, 0)
source: "#Cube"
scale: Qt.vector3d(3, height / 100, 1)
materials: PrincipledMaterial {
baseColor: "#554433" //"brown" color
}
}
}
Output of above sample looks like below image:
What each piece does
- XrView
- Replaces View3D as the entry point for XR scenes.
- Handles connection to the XR runtime (OpenXR, visionOS, etc.), head tracking, and multi-view rendering. doc.qt.io+1
- SceneEnvironment
- Controls background, lighting model, tonemapping, etc.
- A procedural sky (ProceduralSkyTextureData) is used as a light probe, so the lighting looks more natural. We're setting "skyblue" as sky's color.
- MSAA antialiasing improves edge quality.
- Background is a solid sky blue color.
- probeHorizon adjusts how the sky lighting fades near the horizon.
- XrOrigin
- Defines the origin of tracked space; controllers and hands are positioned relative to this.
- In typical room-scale setups, the origin is near the center of the play area at floor height. felgo.com
- Setting z: 100 means: the player’s origin is 100 units “forward” (along +Z) relative to your global coordinates (or vice versa, depending on how you think about your scene).
- DirectionalLight
- Simple “sunlight”. The eulerRotation angles position the light above and in front of the user.
- Model for floor & cube
- #Plane and #Cube are built-in primitive meshes from Qt Quick 3D Helpers.
- We scale and rotate the plane to act as a floor, and we place a 30 cm cube 1 m in front of the user’s head.
- XrController: representing the right-hand controller & the ray
- Represents a tracked controller or hand pose in 3D.
- controller: XrController.ControllerRight selects the right-hand device; poseSpace: XrController.AimPose tracks the “aim” ray used for pointing. felgo.com+1
- Because XrController inherits from Node, the child Model (ray stick as Cylinder) automatically follows the controller’s position and orientation, acting as a visual marker for your hand/controller.
- rayStick is a helper Node that draws a long, thin cylinder to visualize the pointing ray.
- length controls how long the ray should be in front of the controller.
- The Model:
- Uses the built-in #Cylinder mesh.
- Is rotated 90° in X so it extends along local Z.
- Is scaled to be very thin and long; length sets its size.
- Semi-transparent green → a typical laser pointer look.
- z: -length/2 shifts the cylinder so its base sits near the controller and extends forward.
- Floor and table: static world geometry
-
- These are not children of XrOrigin, so they’re placed in world coordinates.
- Uses a built-in #Rectangle mesh.
- Rotated -90° in X so it lies flat in the XZ plane (Y up).
- Scaled to make a larger floor (5×5).
- Simple green(for floor), like brown(for table) material.
From here, it’s a small step to what you’re already doing in your project: attaching QML panels, ray-picking boards, and synchronizing transforms across multiple devices.
Conclusion: XR Is Just Another Platform You Can Own
AR and XR can sound buzzword-heavy, but at this point they’re really just another runtime environment for the same core skills you already use: 3D thinking, good UX, and solid engineering.
We saw how:
- AR sits in the real world, overlaying digital content on reality.
- XR is the bigger spectrum that includes AR, VR, and mixed-reality in between.
- Today’s devices (Quest, Vision Pro, Galaxy XR, PC VR, etc.) are powerful enough that the hardware is no longer the main bottleneck—content and UX
- XR is already transforming domains like training, healthcare, architecture, remote collaboration, and productivity, not just games.
On the tooling side, engines like Unity and Unreal dominate classical game-style XR, but they’re not the only option. If you come from the Qt world, Qt Quick 3D XR lets you reuse your C++/QML skills to build spatial apps: control panels, dashboards, visualizations, multi-screen workspaces, and “serious” tools that live in 3D space. The small sample we walked through—XrView, XrOrigin, controllers, simple models—is already enough to:
- Render 3D content in a headset
- Track the user’s head and hands/controllers
- Start experimenting with interaction, locomotion, and UI panels in 3D
The big shift isn’t so much technical as mental: instead of “windows and tabs”, you’re placing objects, information, and tools in a room around the user. Once you accept that, all your existing experience with state management, networking, UI architecture, and performance suddenly becomes extremely valuable in XR.
If you’re already comfortable with Qt and 3D, you’re closer to XR than you might think. Start with a tiny scene, add one or two interactive elements, and iterate. The step from “Qt desktop app” to “Qt XR app” is no longer a leap—it’s just your next branch
※ References:
https://en.wikipedia.org/wiki/Augmented_reality?
https://www.g2.com/articles/history-of-augmented-reality?
https://en.wikipedia.org/wiki/Extended_reality?
https://vr-compare.com/headset/metaquest3?
https://www.apple.com/newsroom/2023/06/introducing-apple-vision-pro/?
https://www.wired.com/story/samsung-galaxy-xr-gemini-android-xr-mixed-reality-headset?
https://www.theguardian.com/film/2025/aug/27/venice-film-festival-extended-reality-cinema-vr?
https://www.index.dev/blog/top-programming-languages-ar-vr-game-development?
https://felgo.com/doc/qt/qt-quick-3d-xr/?
https://doc.qt.io/qt-6/qtquick3d-xr-simple-example.html?
Image source:
https://www.ourfriday.co.uk/image/cache/catalog/Oculus/oculus-3-7-800x800w.jpg
https://media.wired.com/photos/647e2a2040f1b0ff578445a2/3:2/w_1920,c_limit/Apple-Vision-Pro-Gear.jpg
https://www.ourfriday.co.uk/image/cache/catalog/Oculus/oculus-3-3-800x800.jpg
https://e3.365dm.com/23/06/1600x900/skynews-apple-headset_6179275.jpg?20230605202646