GitLab Runner is an open-source application designed to execute jobs defined in GitLab CI/CD pipelines. Whether you’re building, testing, or deploying code, GitLab Runner acts as the engine driving automation in your development lifecycle.
1. Key Features of GitLab Runner:
- Multi-Platform Support: Works across Linux, macOS, Windows, and even Docker containers, providing unmatched versatility.
- Executor Options: Includes Shell, Docker, and Kubernetes executors to cater to various infrastructure setups.
- Concurrent Jobs: Allows multiple jobs to run simultaneously, improving pipeline efficiency.
- Open Source: Being open-source, GitLab Runner offers flexibility for custom configurations.
2. Installing GitLab Runner on Window:
For Windows users, download the GitLab Runner binary from the official GitLab website and execute the following commands:
cd install-folder
.\gitlab-runner.exe install
.\gitlab-runner.exe start
install-folder is the directory without the gitlab-runner.exe file.
3. Registering GitLab Runner:
Once installed, GitLab Runner must be registered with a GitLab instance. The registration process links the runner to a GitLab project or instance and specifies how jobs should be executed. Run the following command to start registration:
gitlab-runner register
During registration, you will be prompted to enter:
- GitLab instance URL
- Registration token (found in GitLab under Settings > CI/CD > Runners)
- Enter a description for the runner.
- the job tags, separated by commas
- an optional maintenance note for the runner.
- Executor type (Shell, Docker, Kubernetes, etc.)
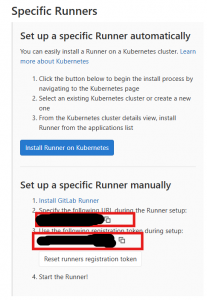
Get GitLab instance URL and token
After successful registration, the runner is ready to execute CI/CD jobs.
How Does GitLab Runner Work?
The process revolves around configuring .gitlab-ci.yml, the pipeline definition file, which outlines the stages and jobs to be executed. GitLab Runner fetches jobs from the CI/CD pipeline and performs them within the specified environment (such as a Docker container).
Example
stages:
  - build
  - test
  - deploy

build_job:
  stage: build
  script:
    - echo "Building the application..."

test_job:
  stage: test
  script:
    - echo "Running tests..."

deploy_job:
  stage: deploy
  script:
    - echo "Deploying the application..."
4. Conclusion
GitLab Runner is a powerful tool that enhances GitLab CI/CD by executing jobs efficiently across different environments. By properly installing, configuring, and optimizing GitLab Runner, teams can significantly improve their development workflows and CI/CD performance.
If you’re looking to automate your builds, tests, and deployments with GitLab, setting up GitLab Runner is a crucial step
 Being a comtor is not just about translating—it’s about resolving tricky situations between Japanese clients and Vietnamese developers. Here are some real-life scenarios and smart ways to handle them!